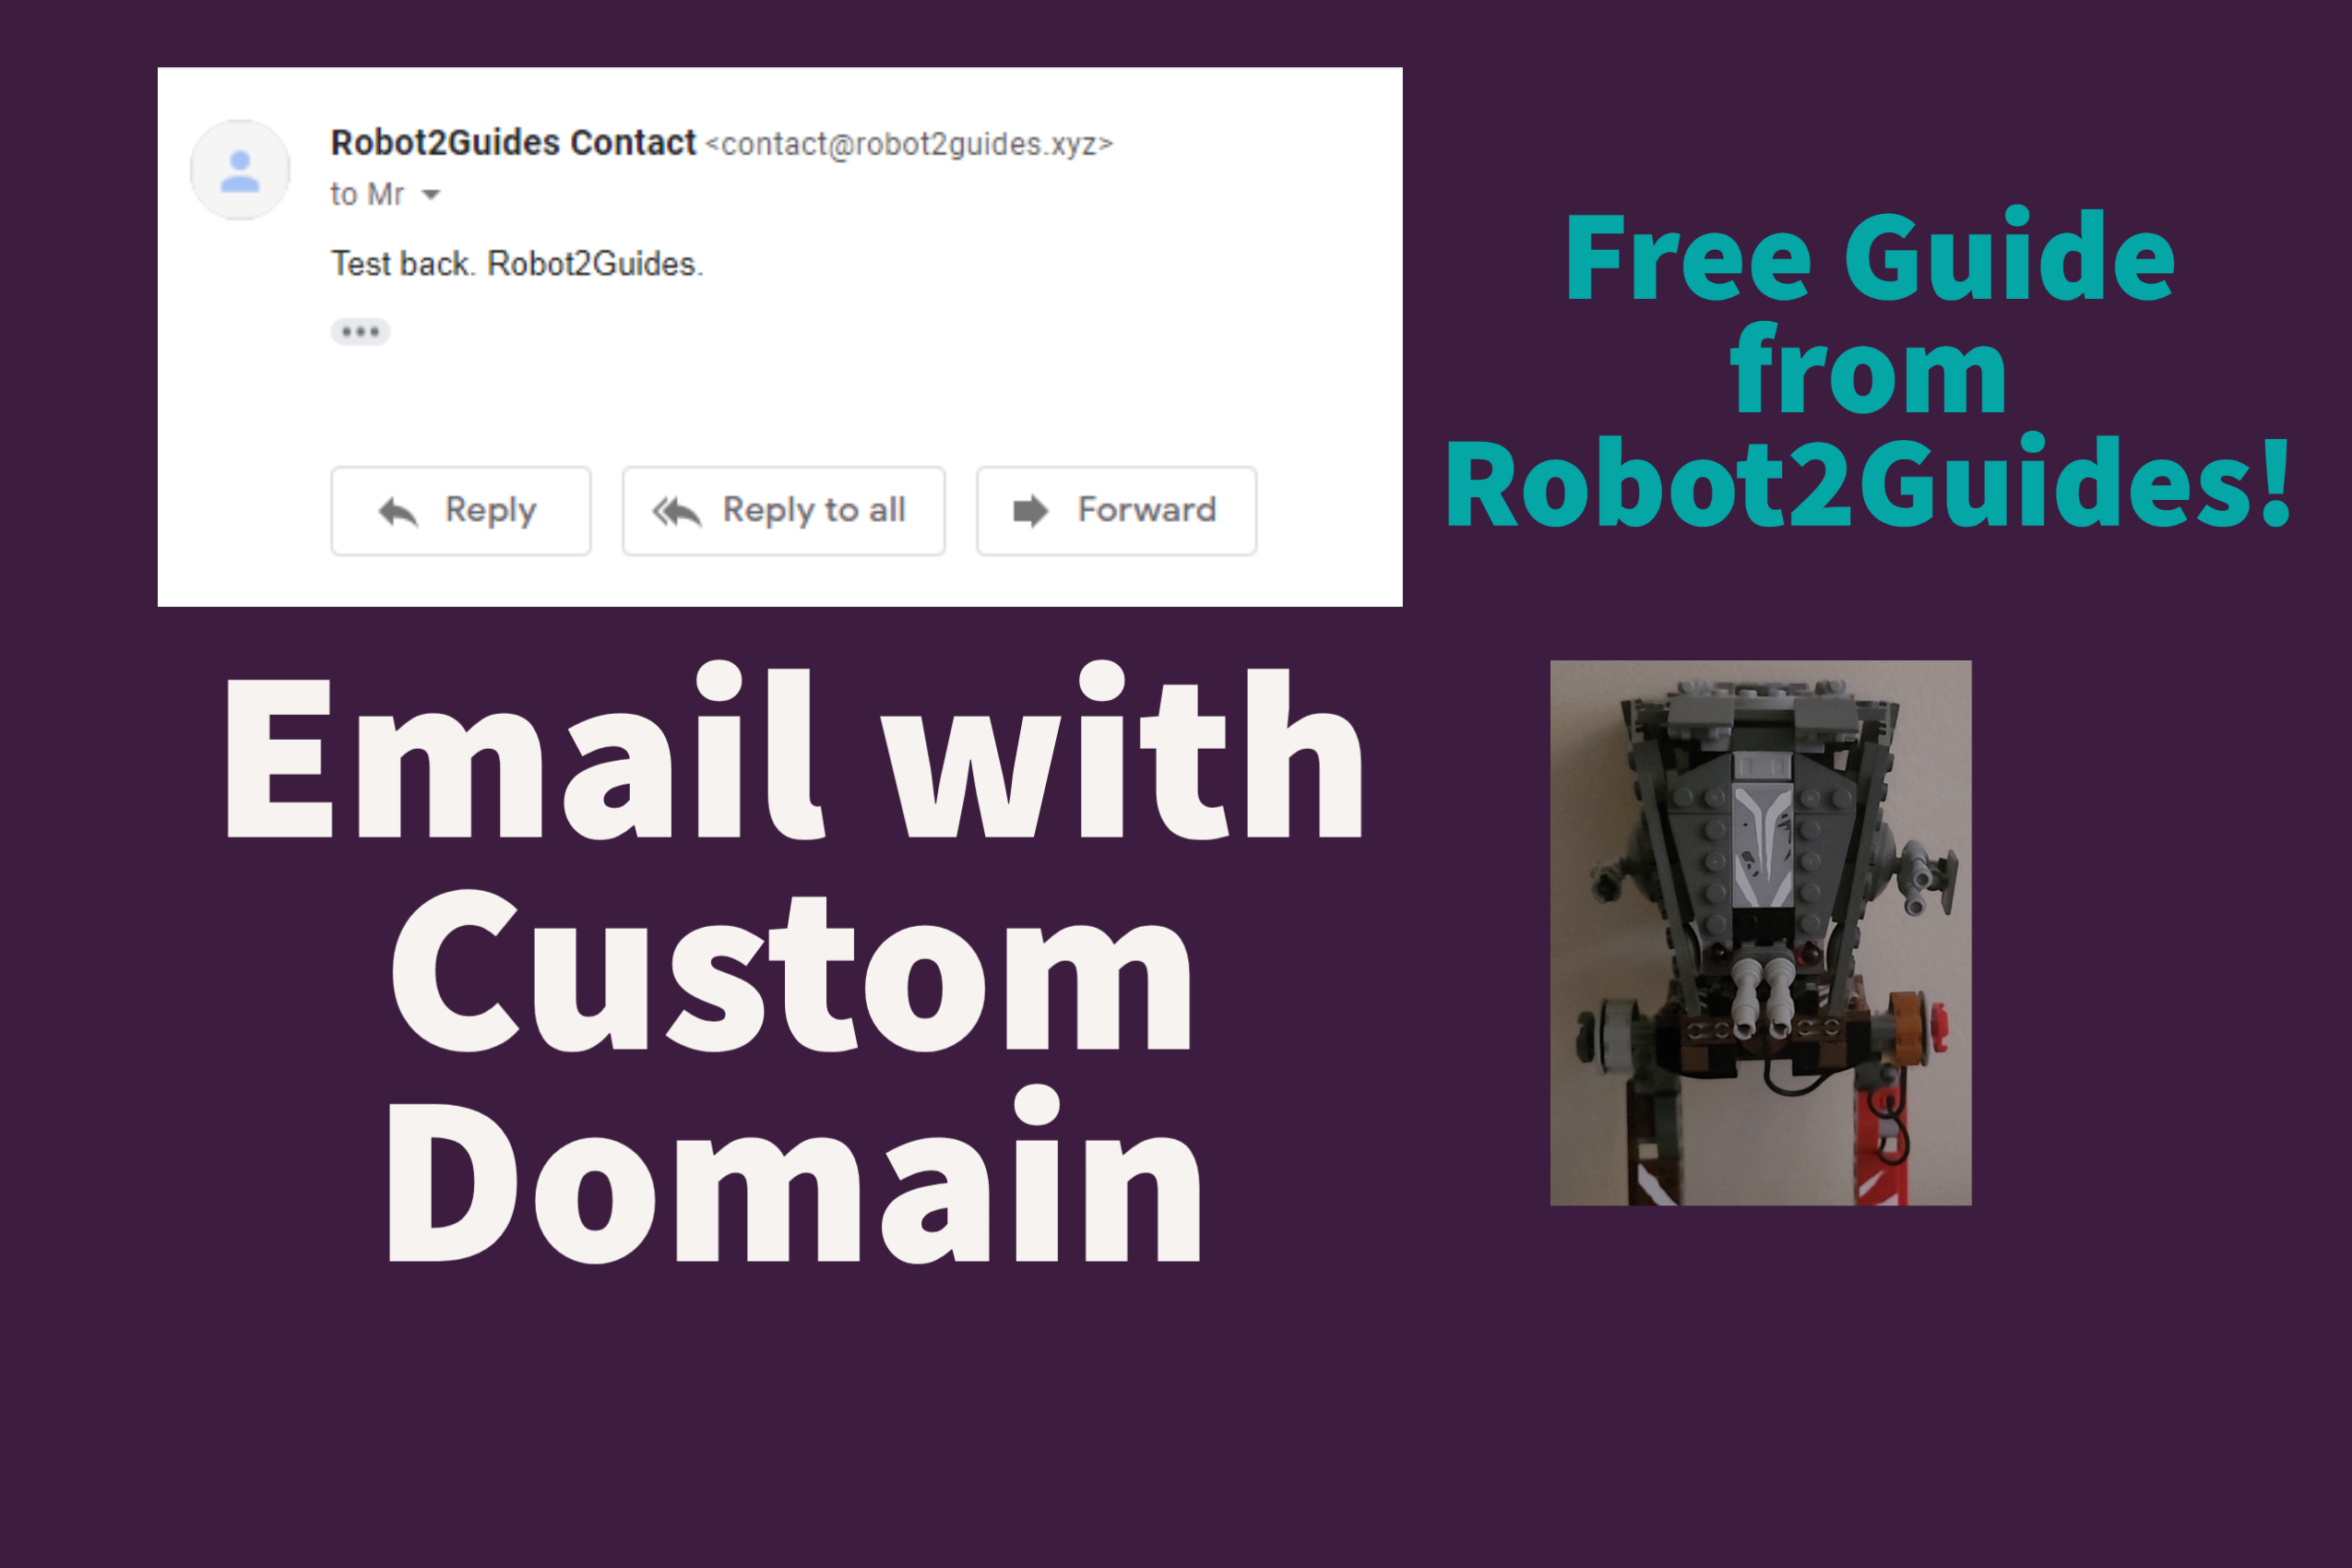
Setting Up Cloudflare DNS
Step 1: Create an account. (If you haven't already)

Create a new account to store your sites there.
Interactive video
Setting up Cloudflare DNS for your domain name is fast and easy!
Go visit them out! Click Here!
You'll need:
Setting Up Cloudflare DNS
Step 1: Create an account. (If you haven't already)
Create a new account to store your sites there.
Step 2: Adding a New Site.
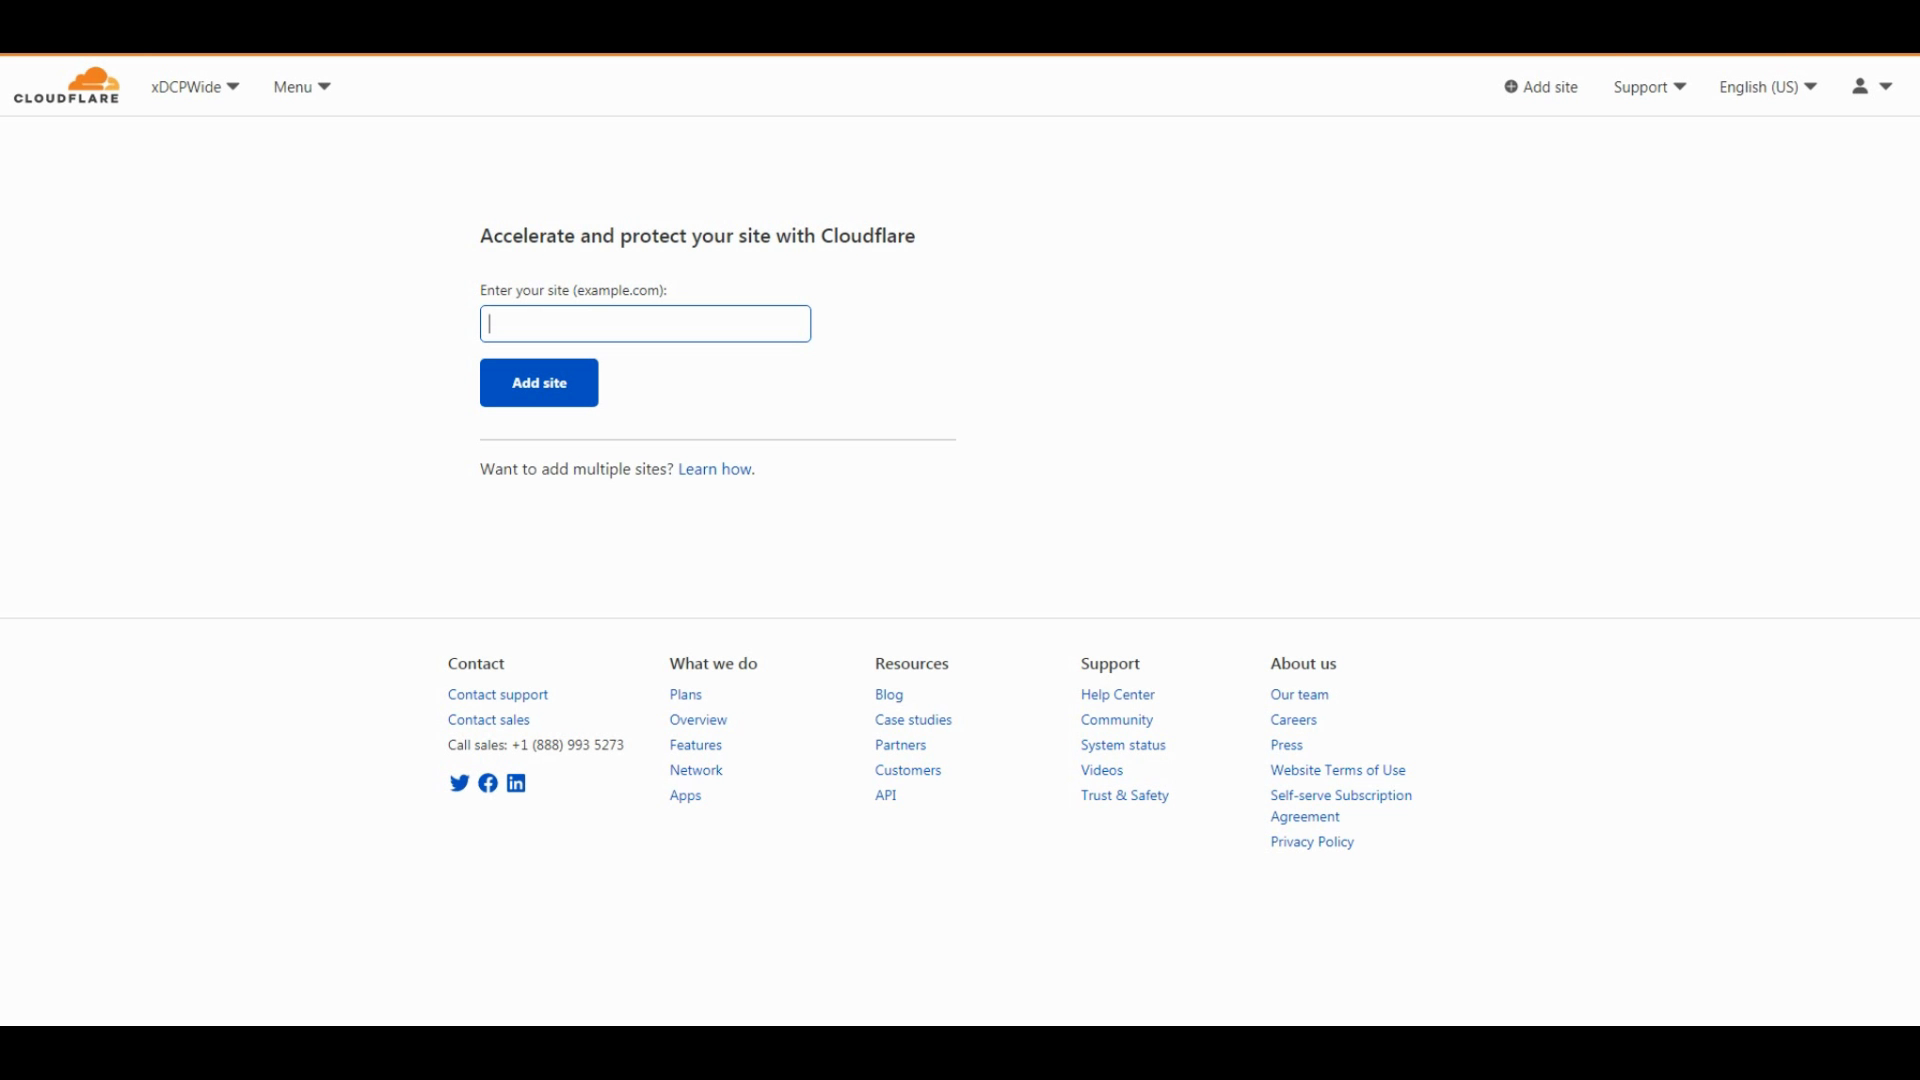
We will add a new site. If you already have an account simply click New Site and add it from there.
Add a domain of your choice. A .com domain or an .xyz domain (for example) is not too expensive and hard to find these days so we recommend you research along your journey to finding a new domain.
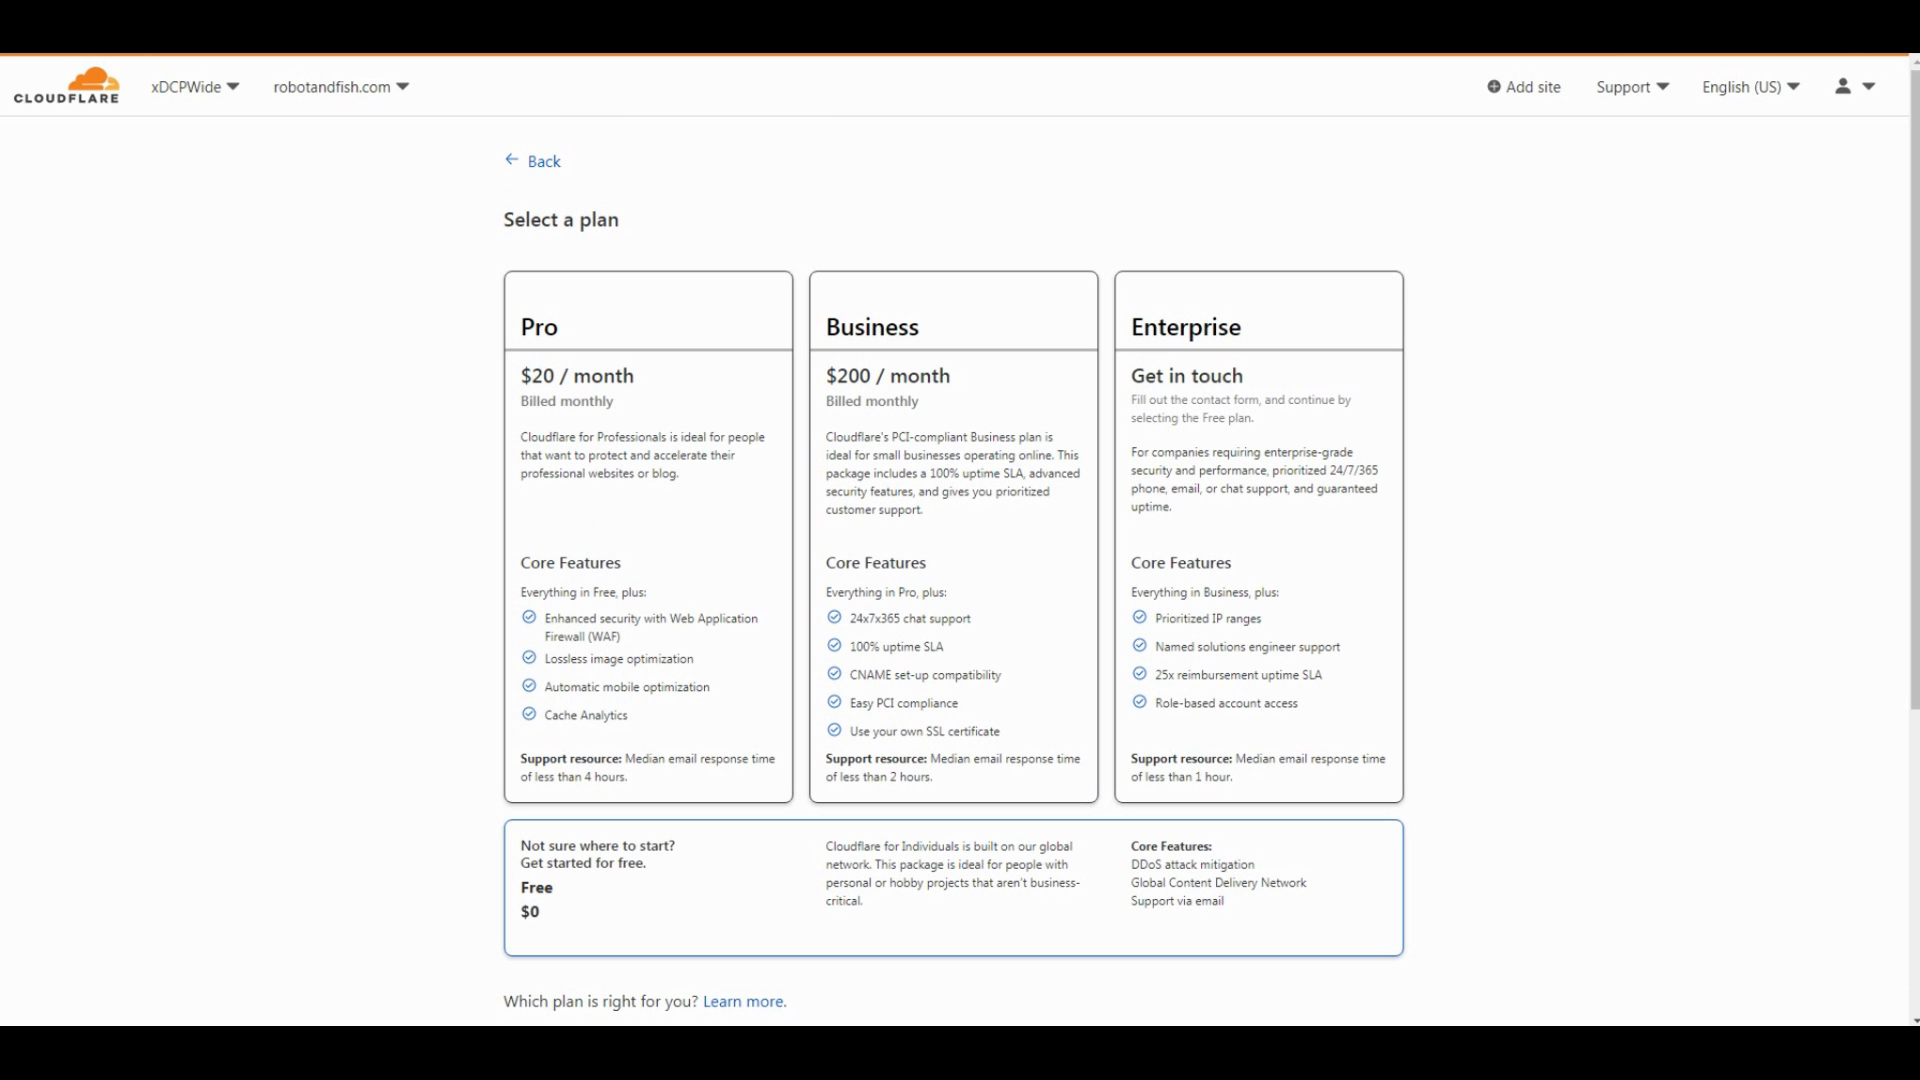
Add a plan to your site. We recommend you choose the Free Plan. Choose plans as you grow later on to maximize your site's performance.
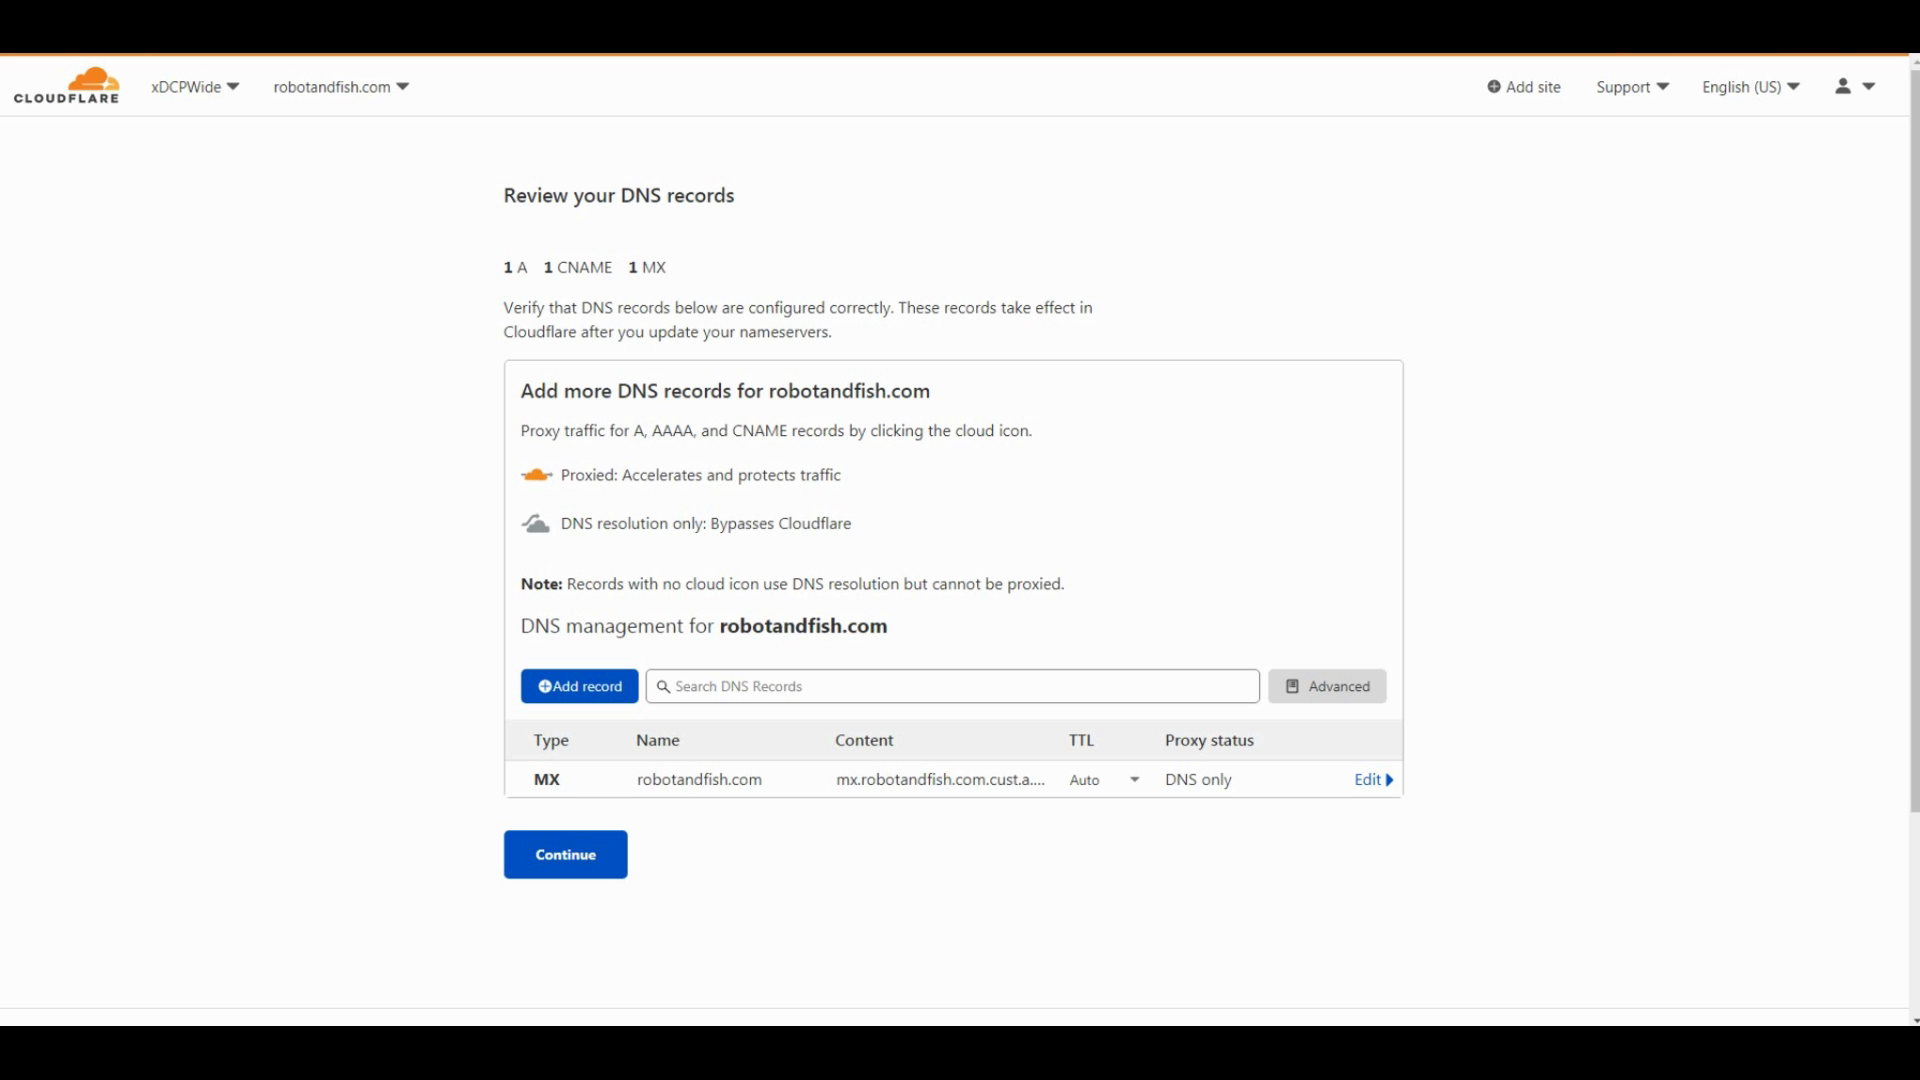
Cloudflare now scans your Domain for existing DNS records on your registrar. You can choose to keep them or modify it. For us, we erased them.
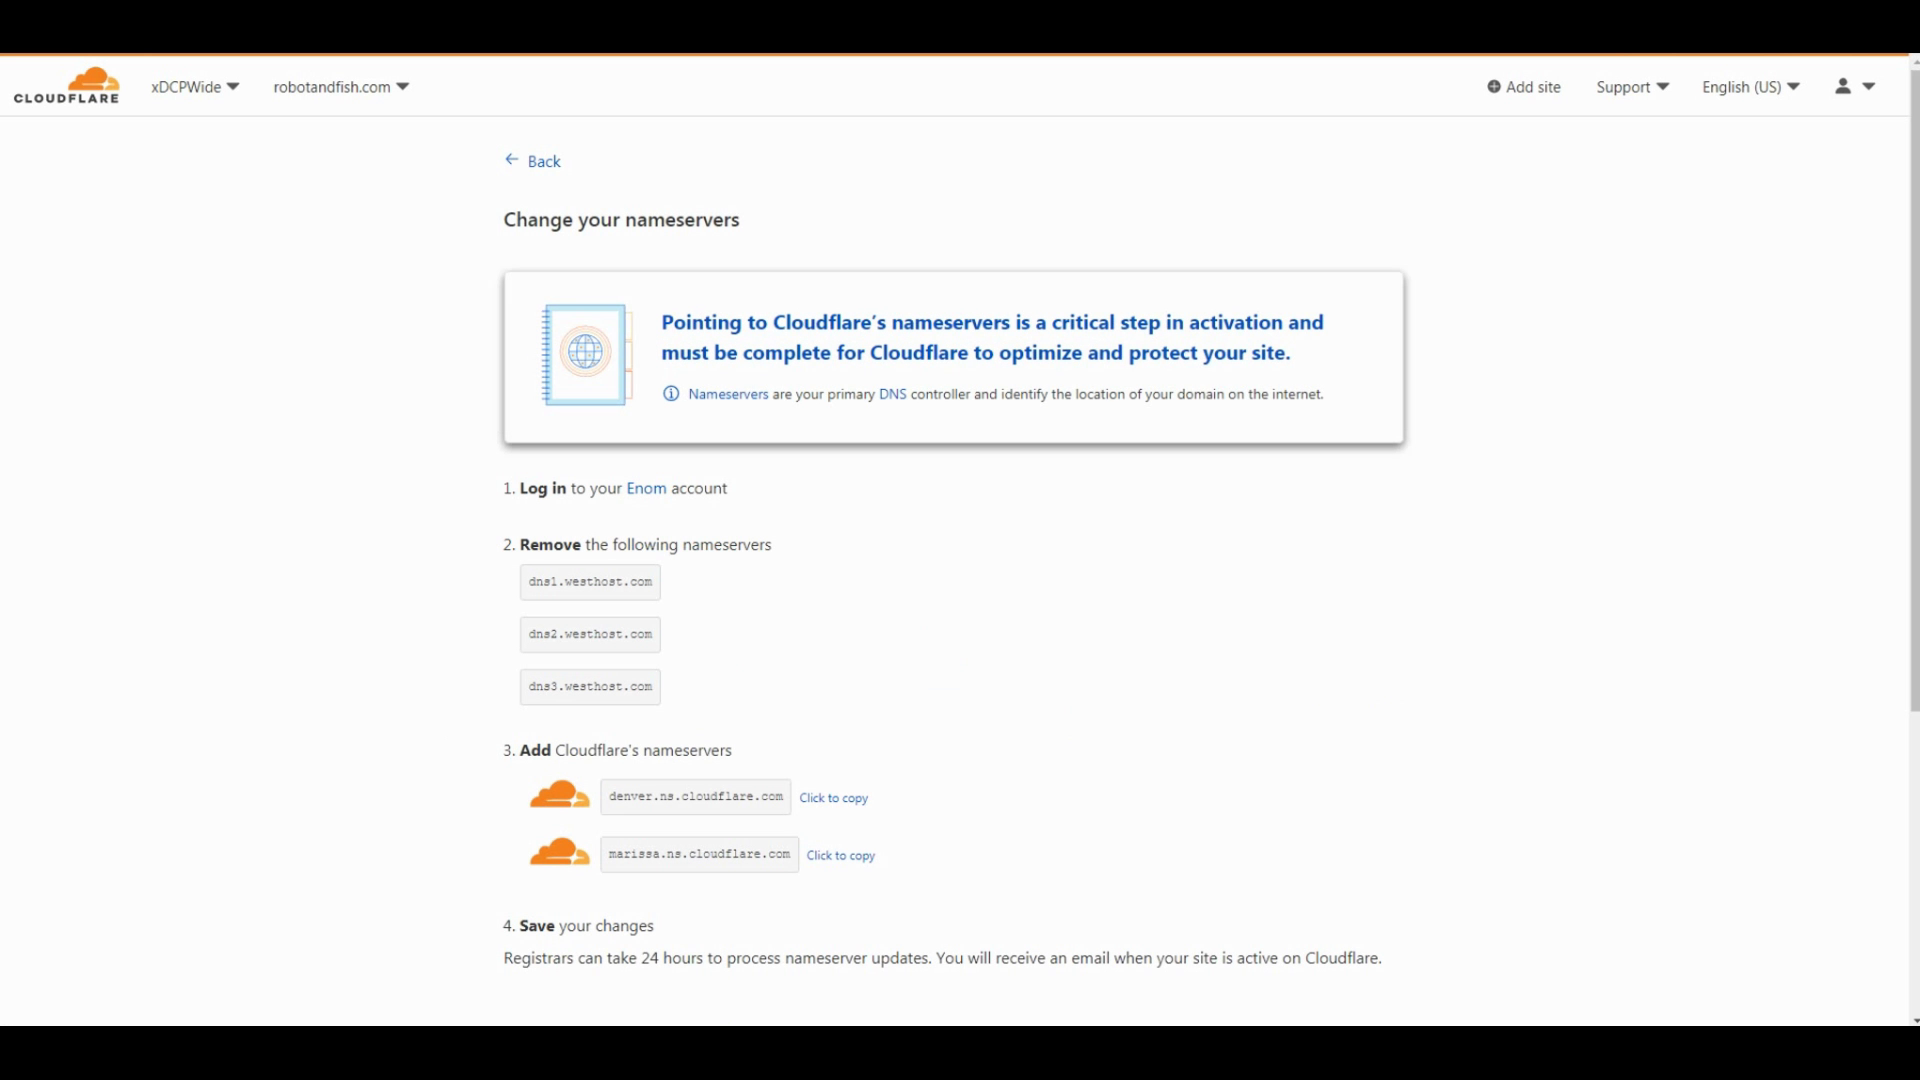
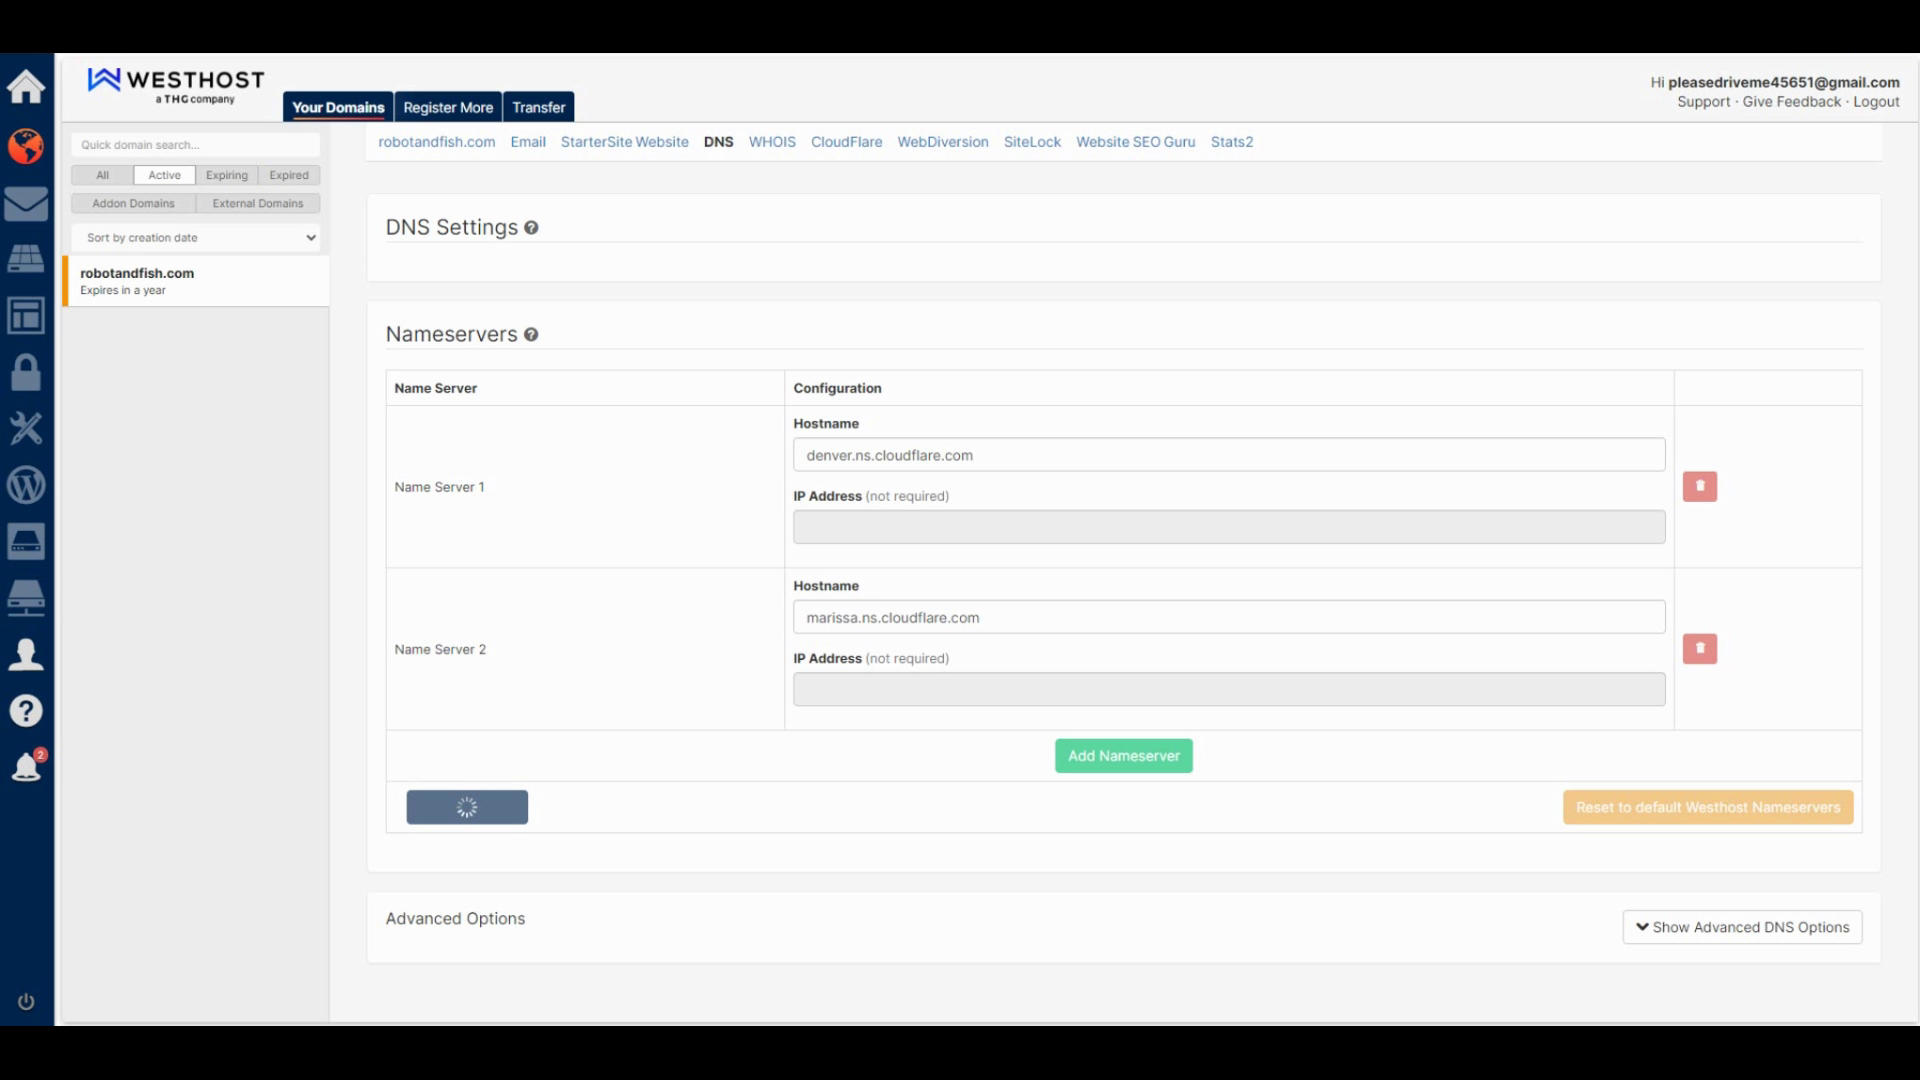
Once after, you need to input the nameservers cloudflare has given you to put into your registrar. Pointing the Nameservers is required for Cloudflare to accelerate your site. Down below is an example of where you put your nameservers into. Some registrars will guide you on how to set it up so please check with them to set your nameservers up.
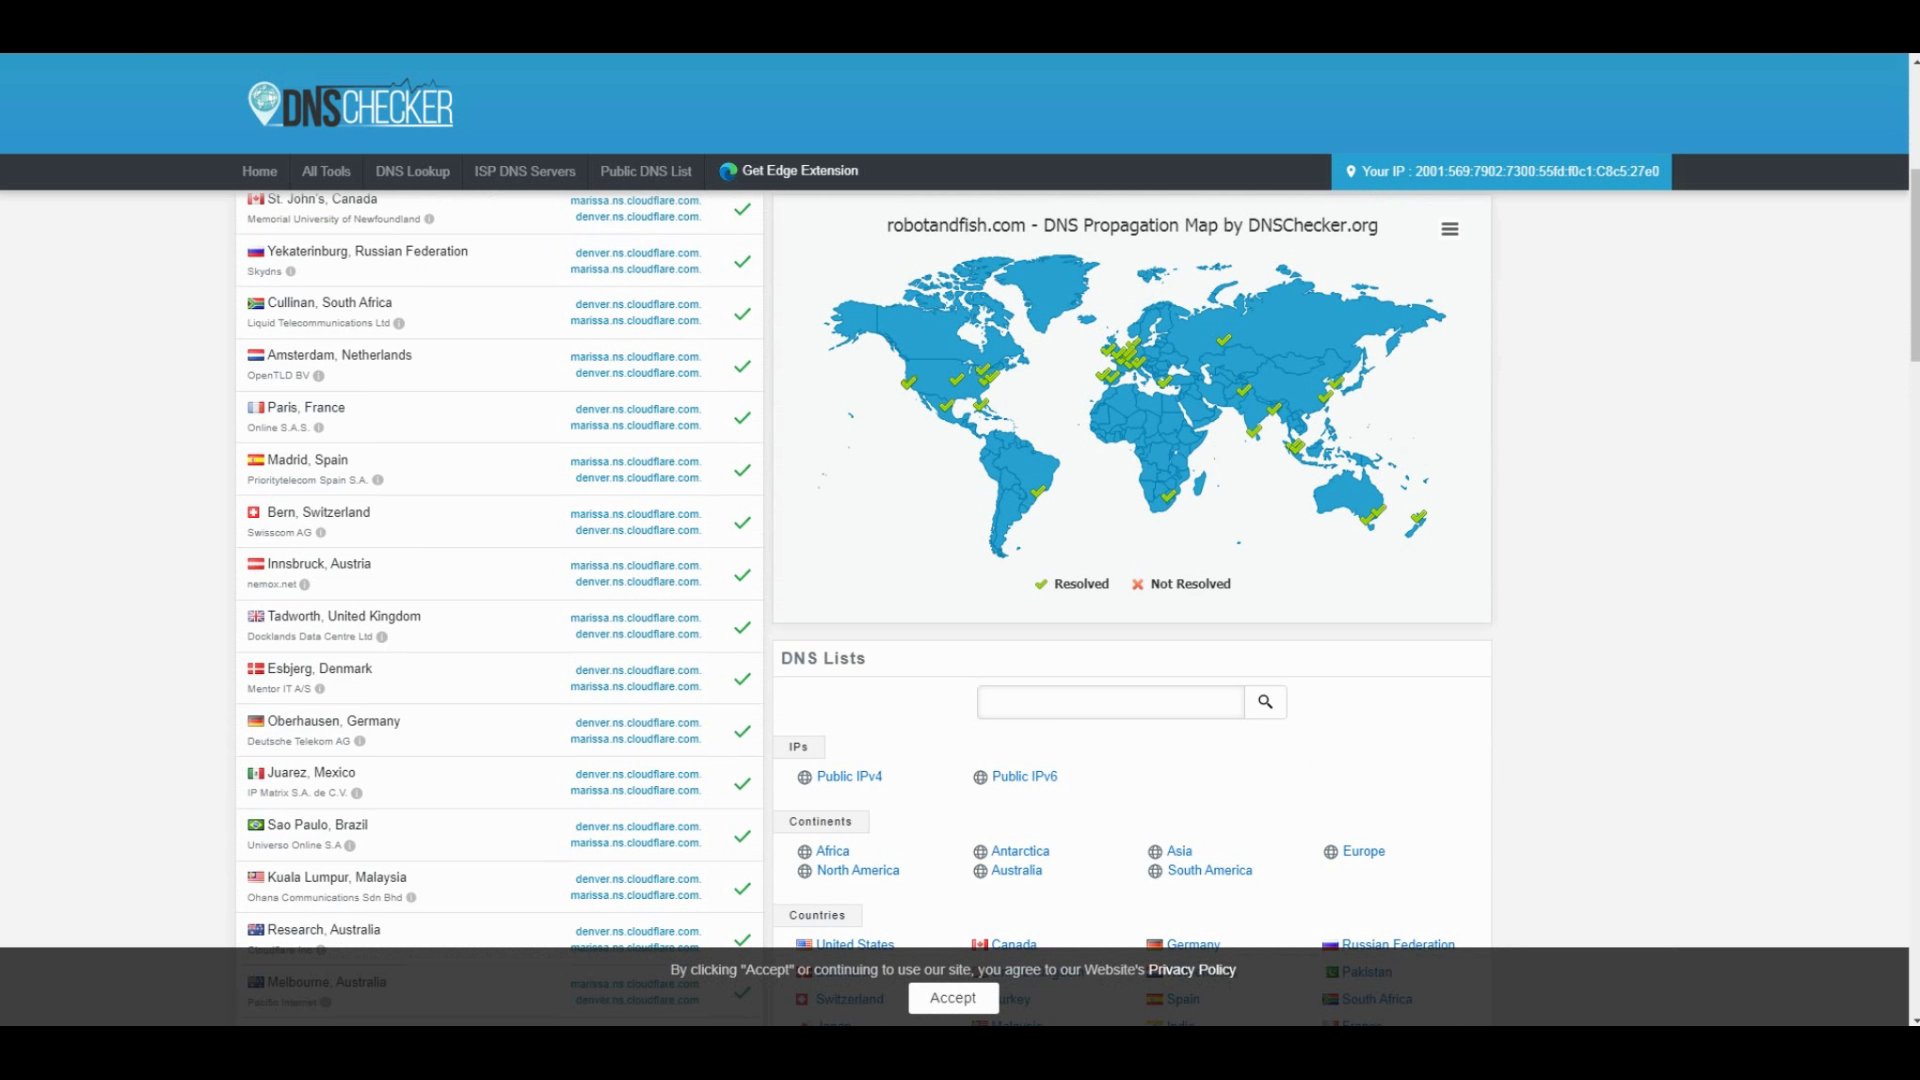
Down below, you'll find the nameservers are propagated using a DNS checker.
After moving on, it's best to have the quick start guide reviewed throughly. Take your time to review it.
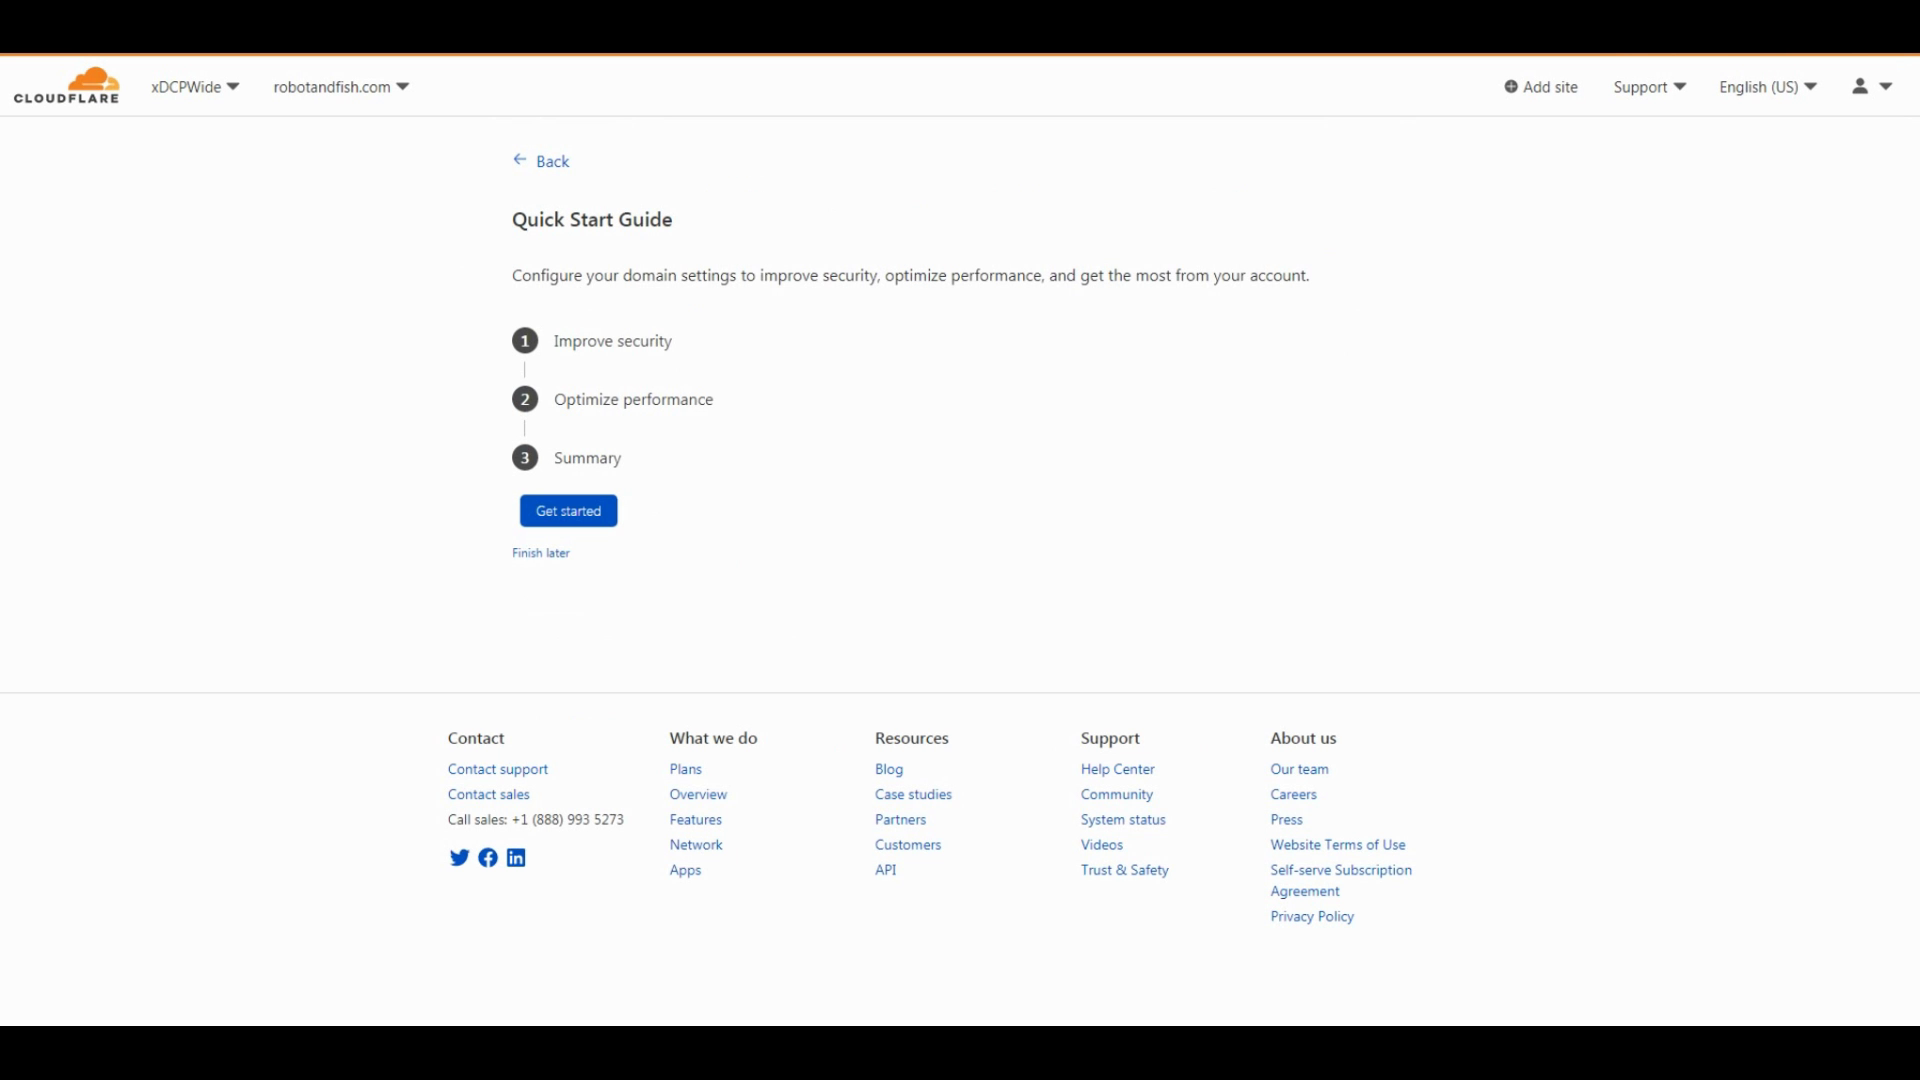
Once you completed the Quick Start Guide, scroll down and click check Nameservers. They will check if your nameservers are added.

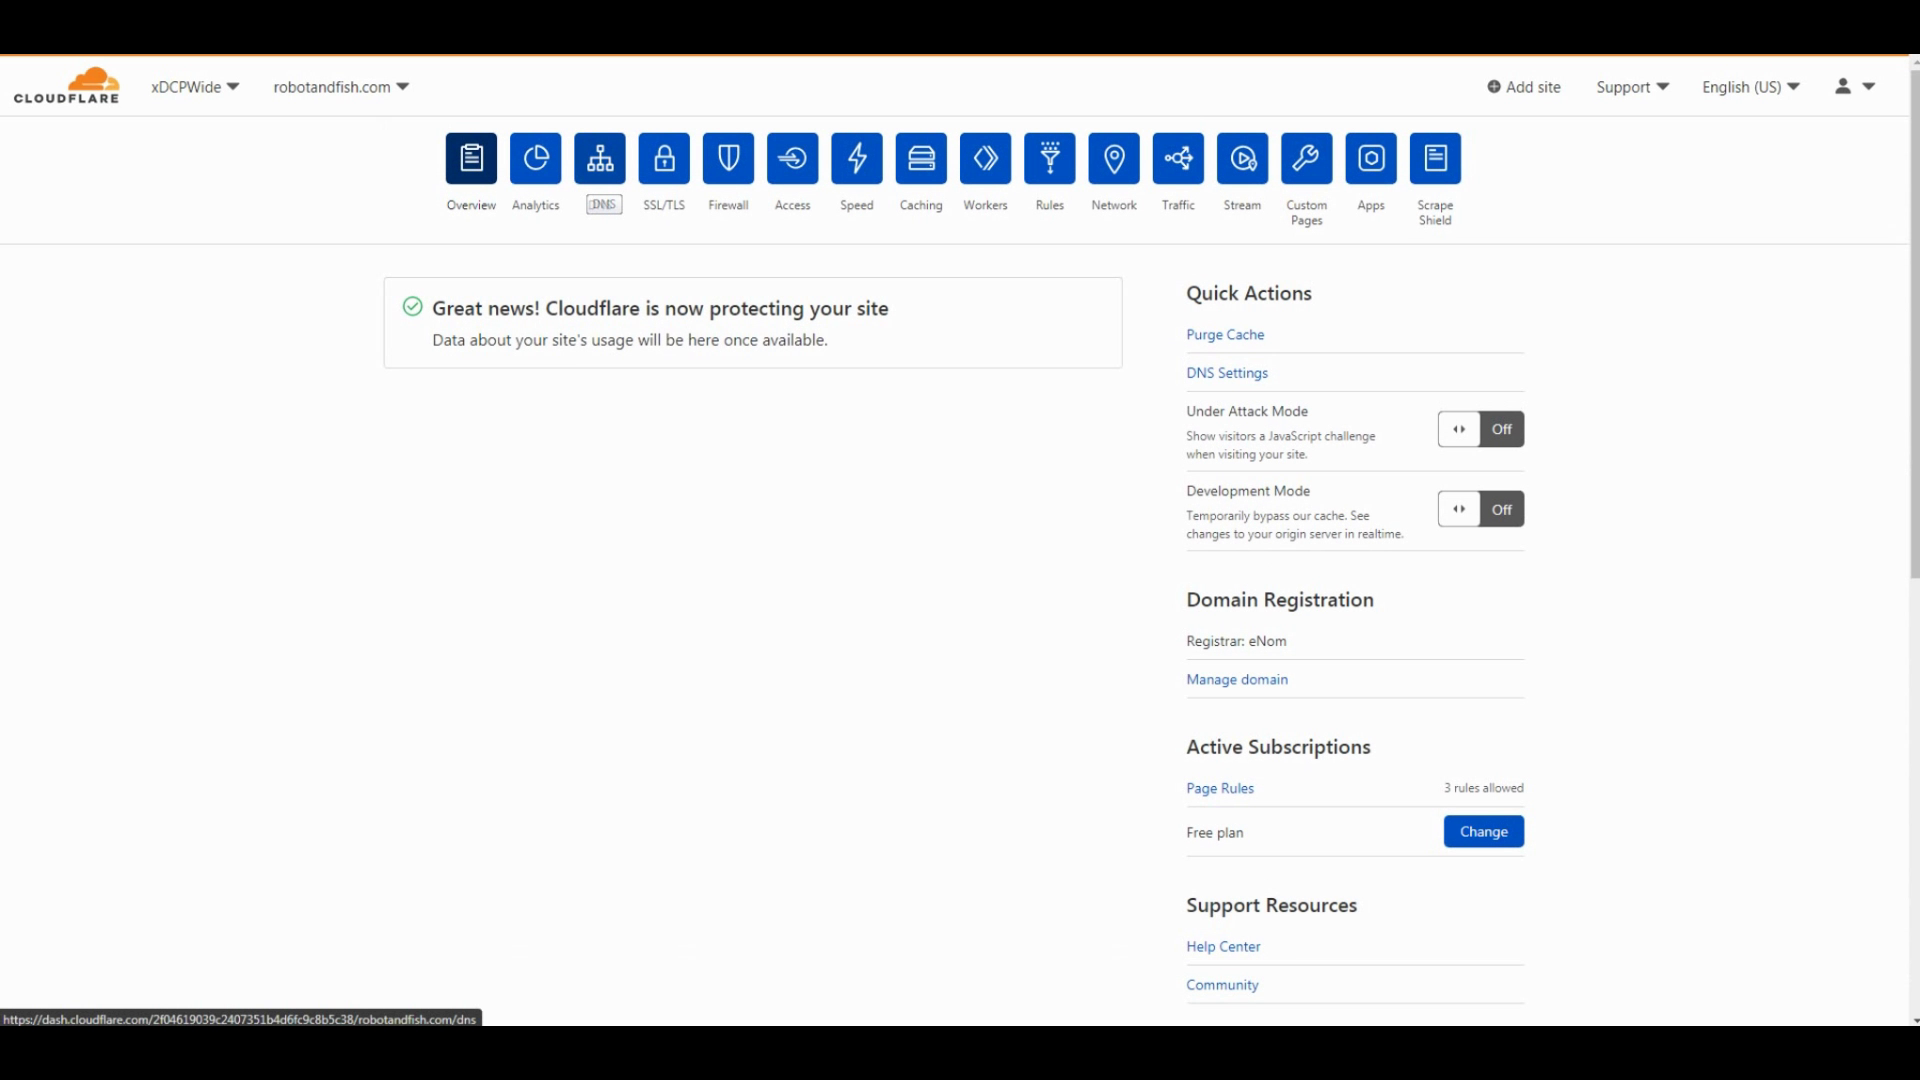
Once after the check, it should be completed and should show this message. You are now ready to set up a Site using your Github Repository.
Setting Up Cloudflare Pages
Step 1: Connect your Github account to Cloudflare Pages
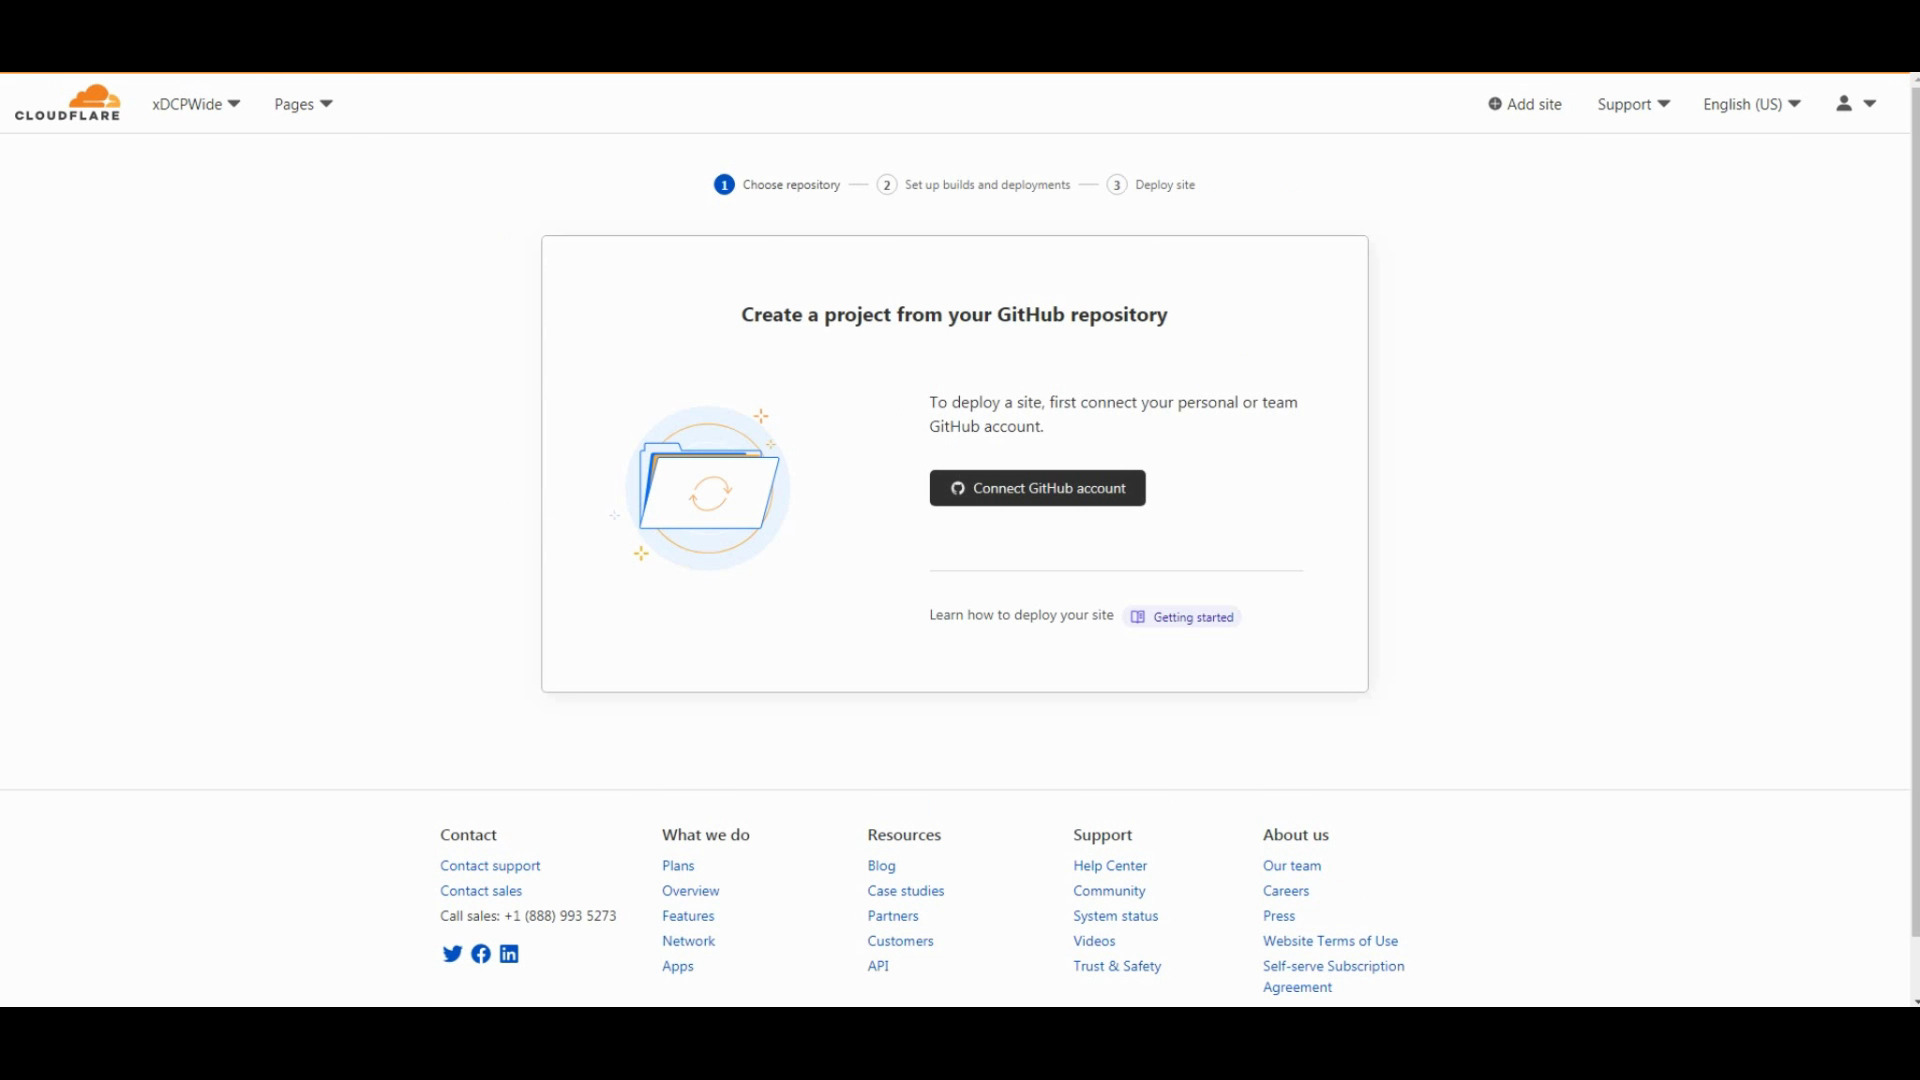
Set up your repository on Github and connect your repository so they can set up your site.
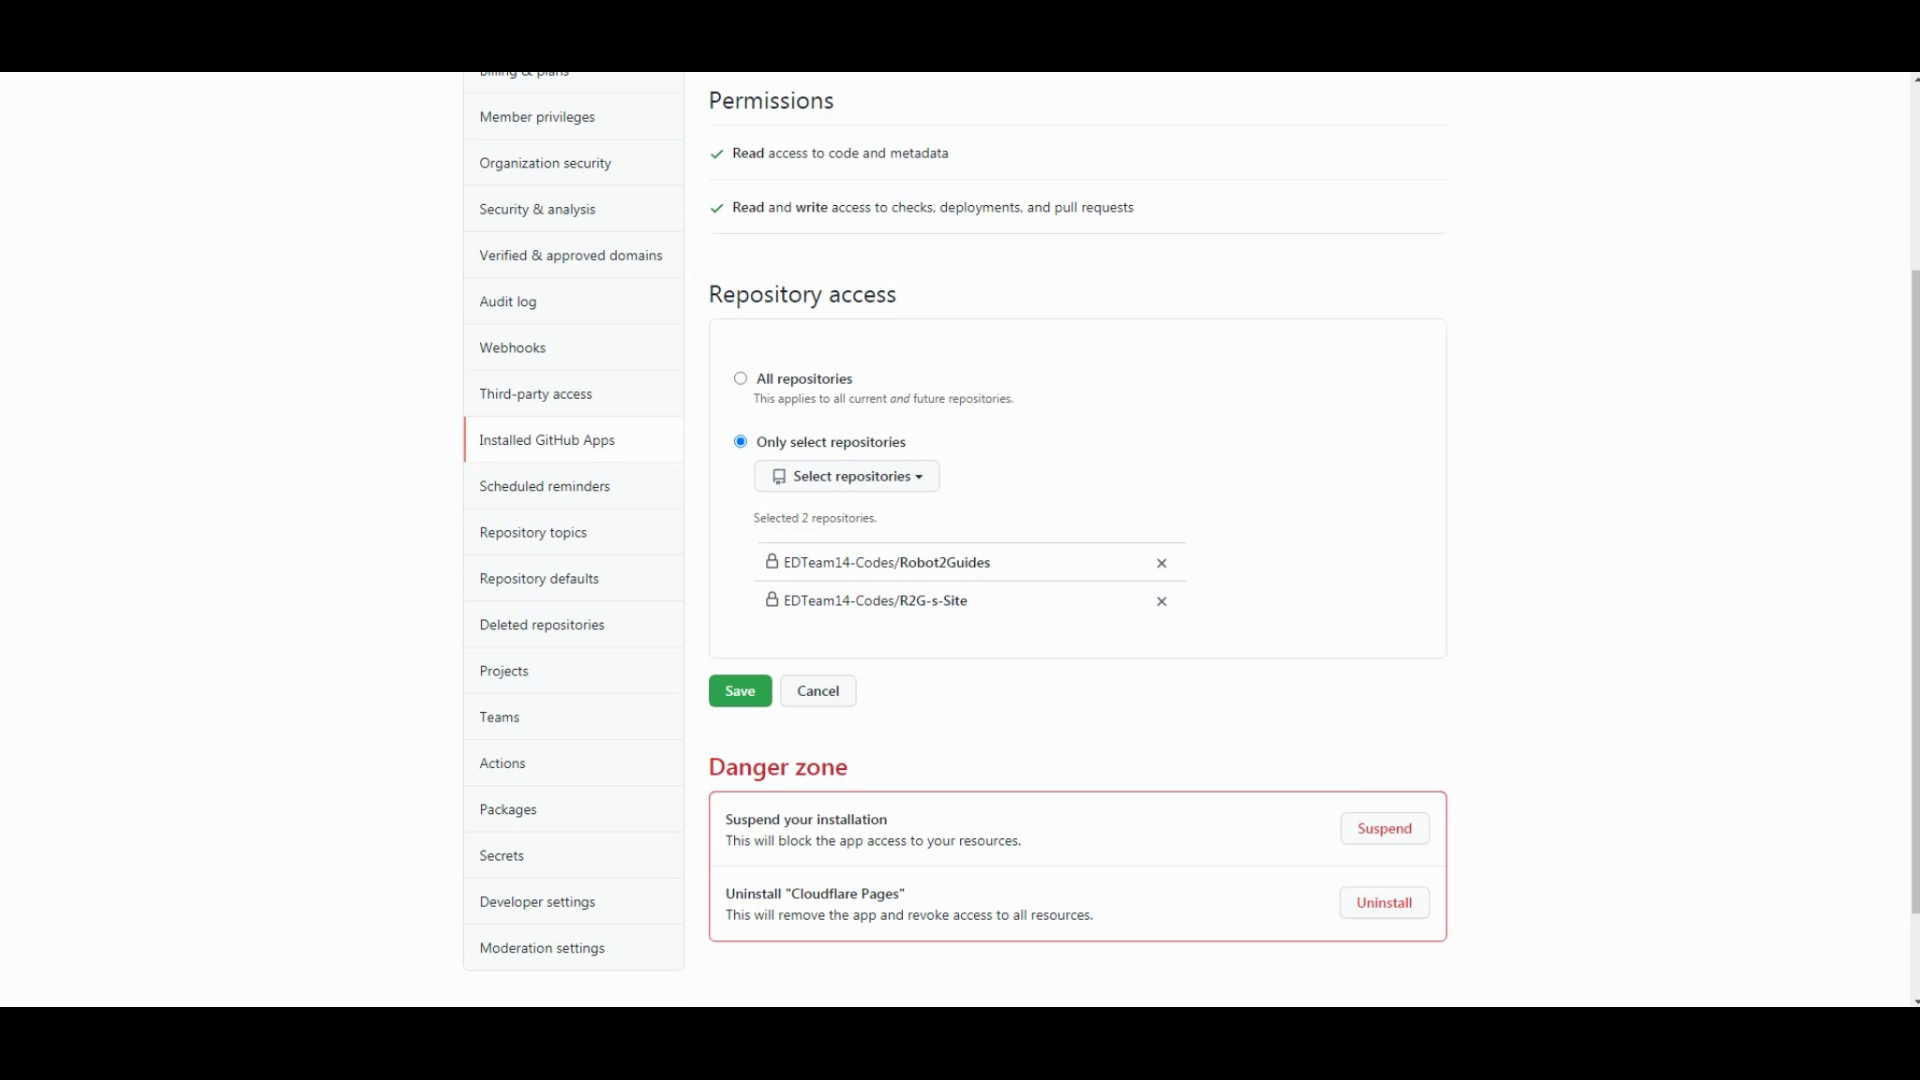
On the Github site, link your repository there. If you are using Select Repositories, make sure to choose the one that you'll set up your site on!
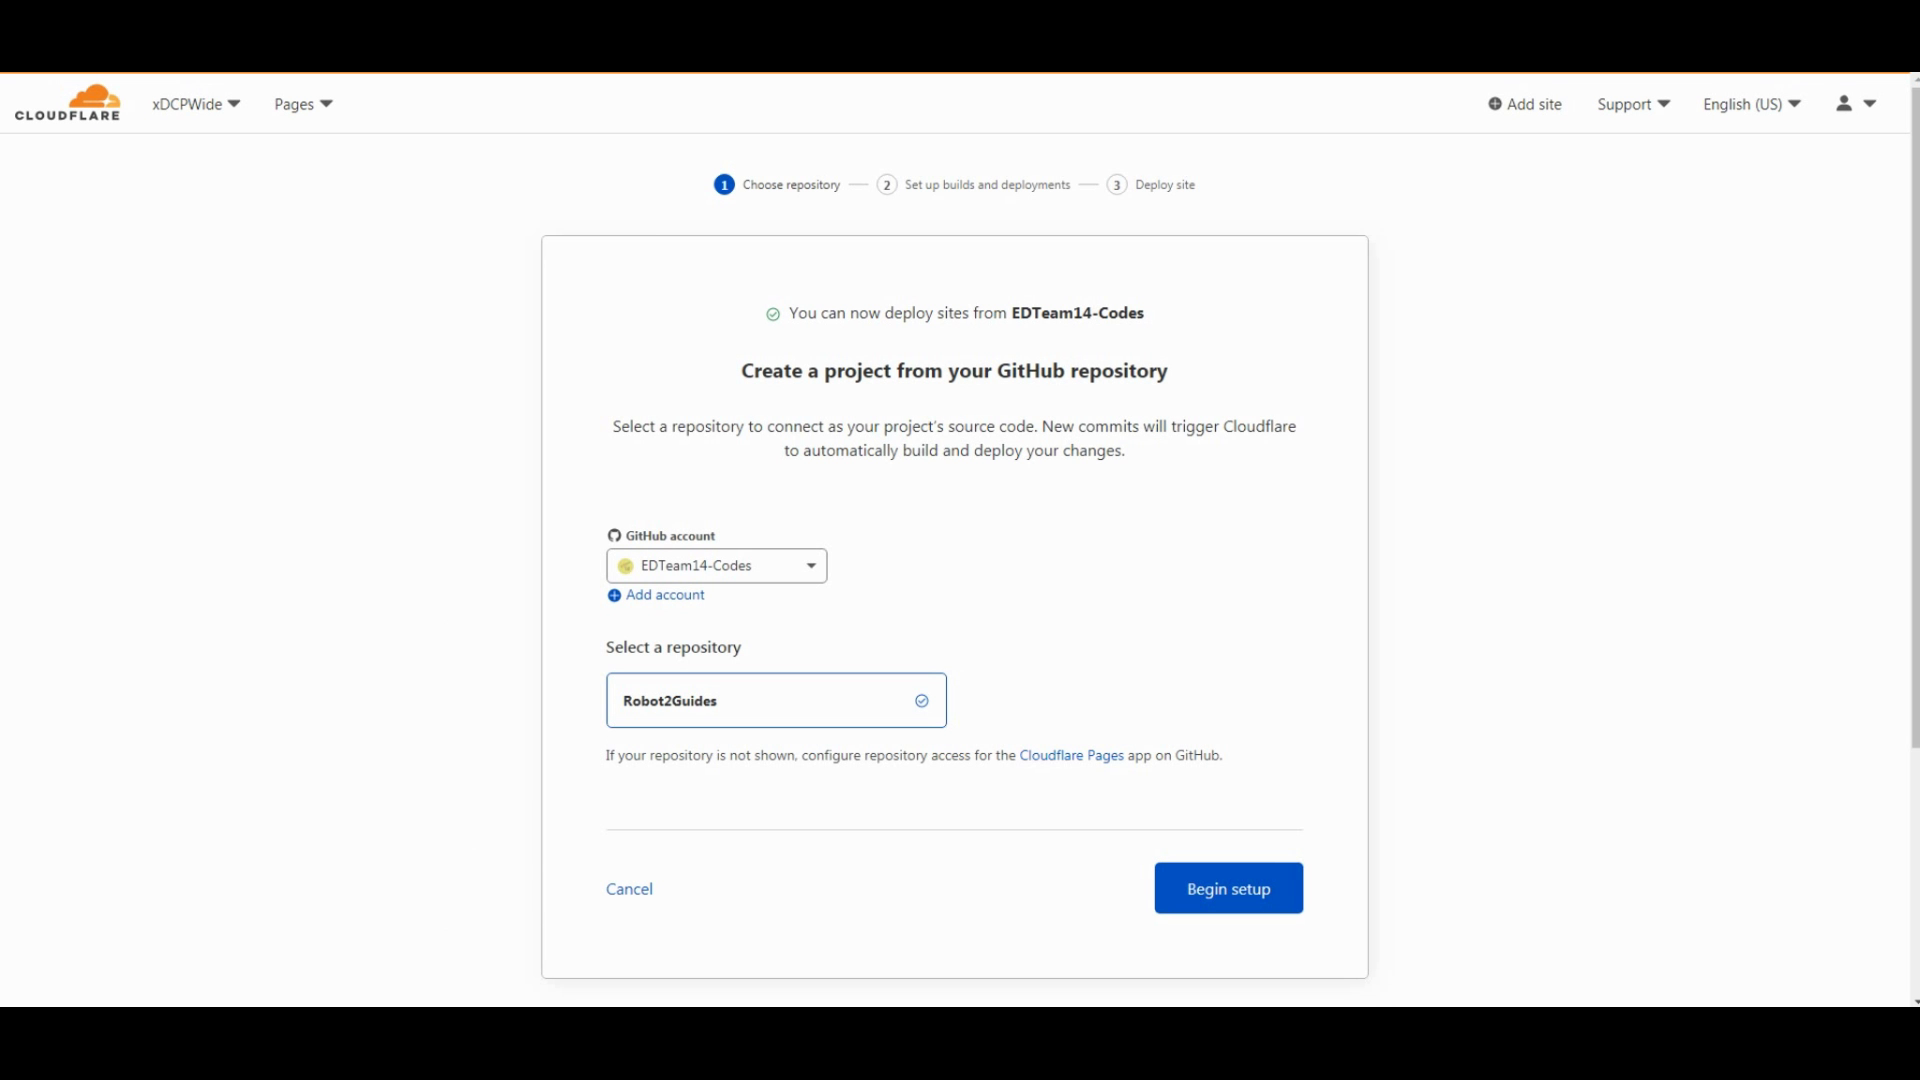
On the page above, click your repository then set it up.
Site 2: Deploying your site and domain.
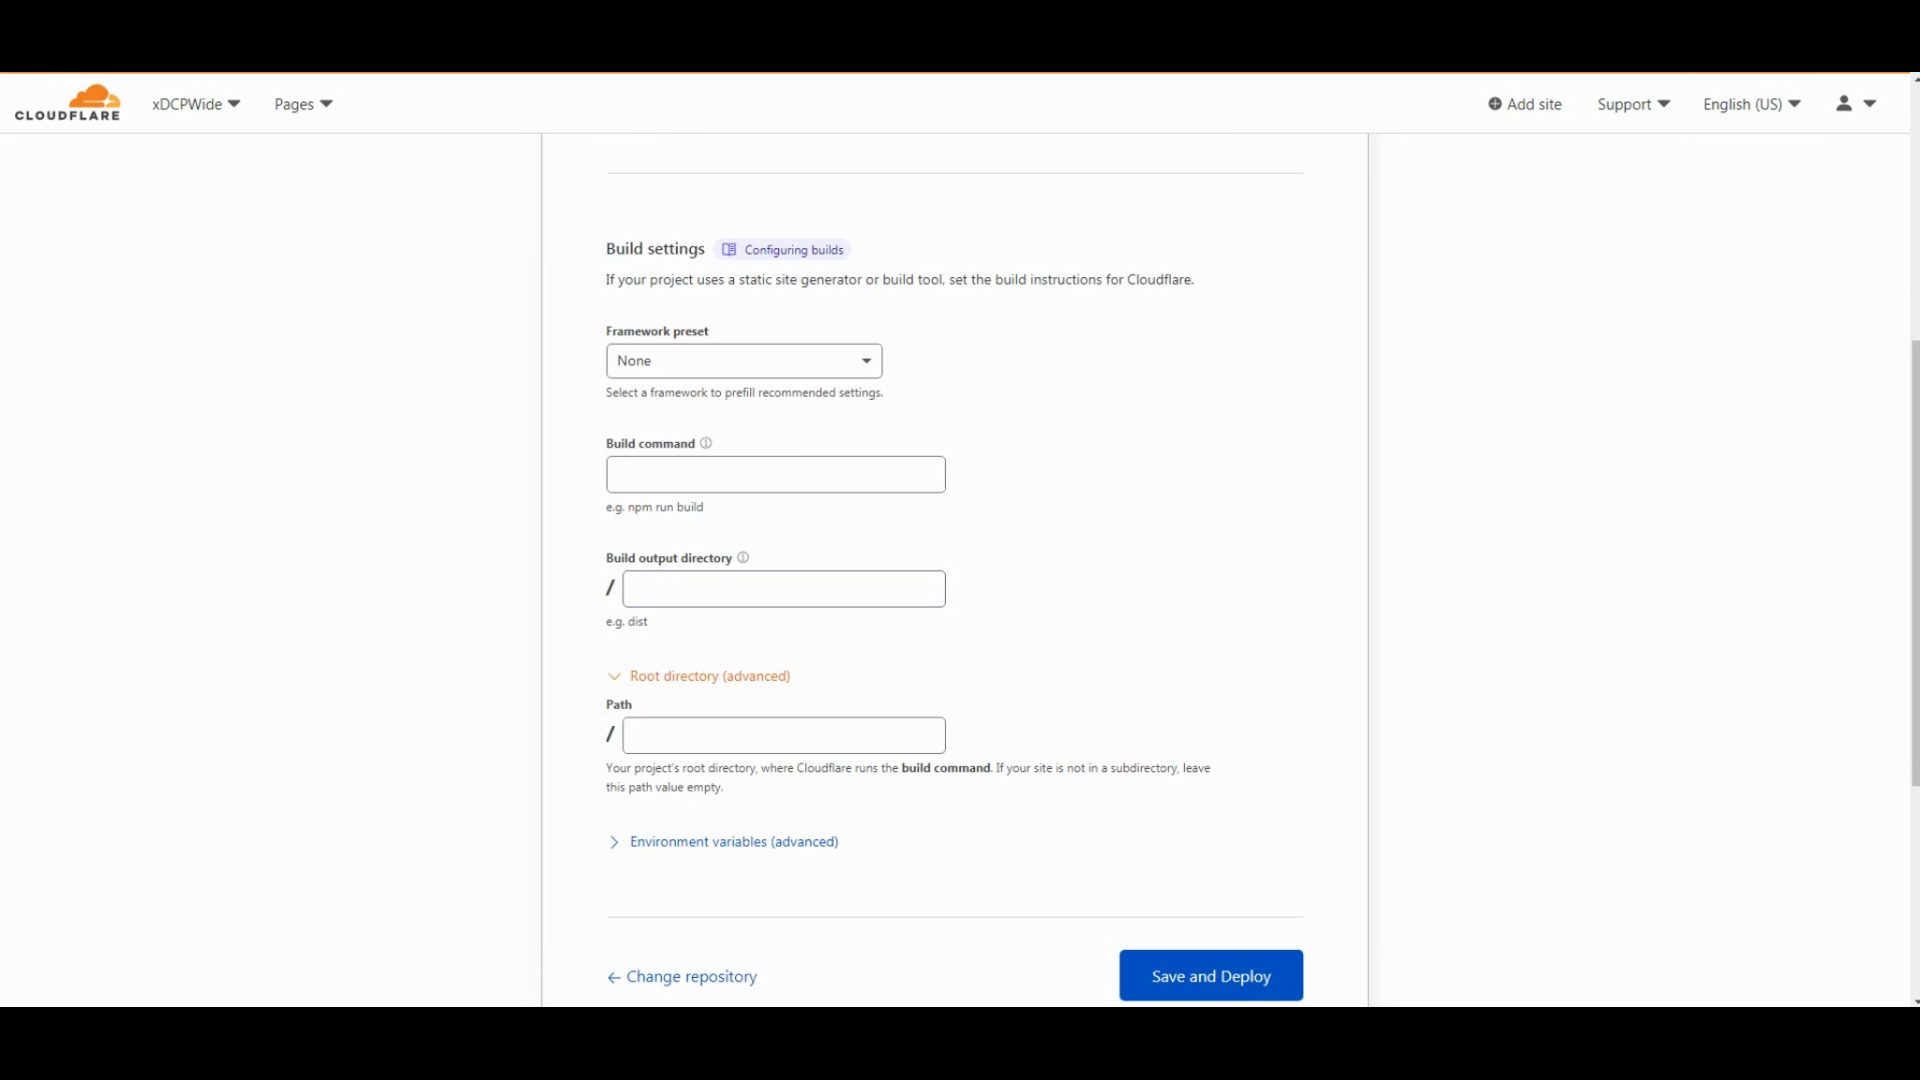
You probably won't need to change these settings to get a site running. Feel free to change settings here if you like. Simply click save and deploy.
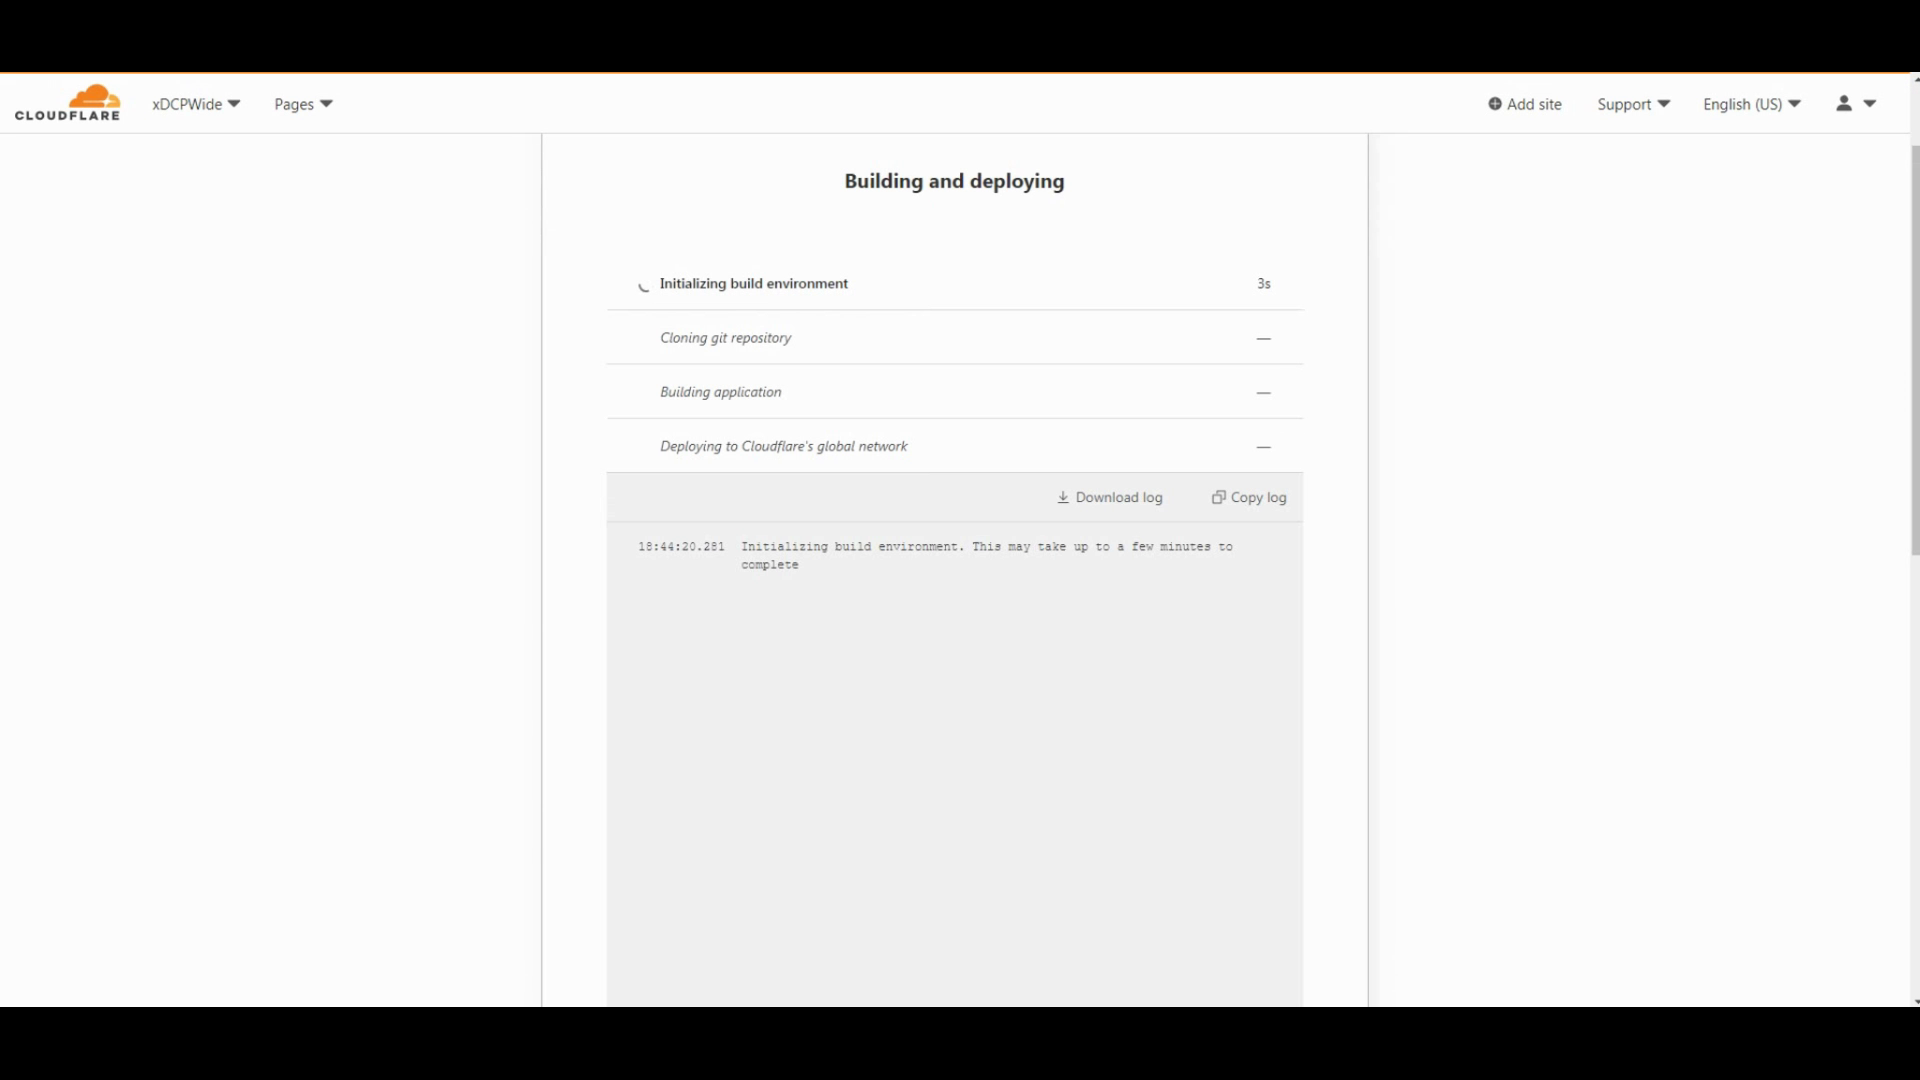
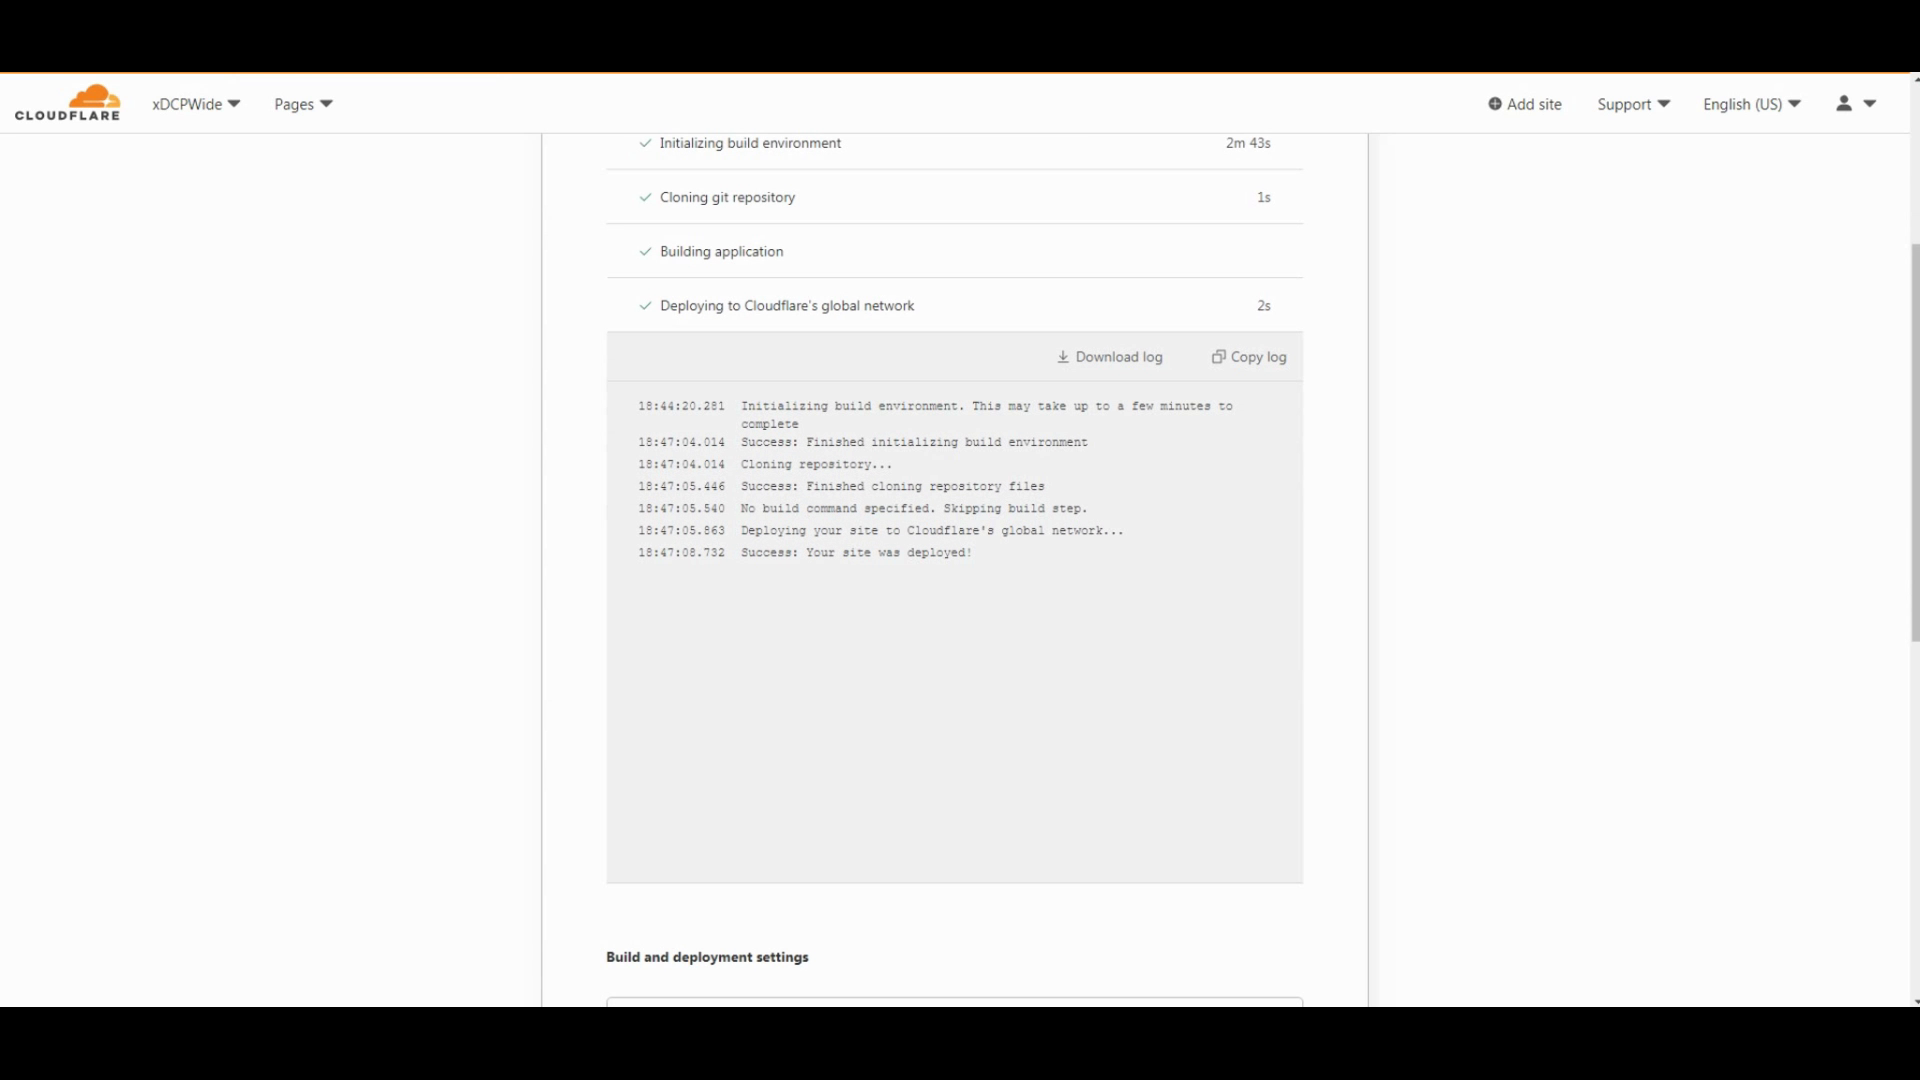
Then you can wait for your site to be deployed. It takes 5 to 10 minutes.
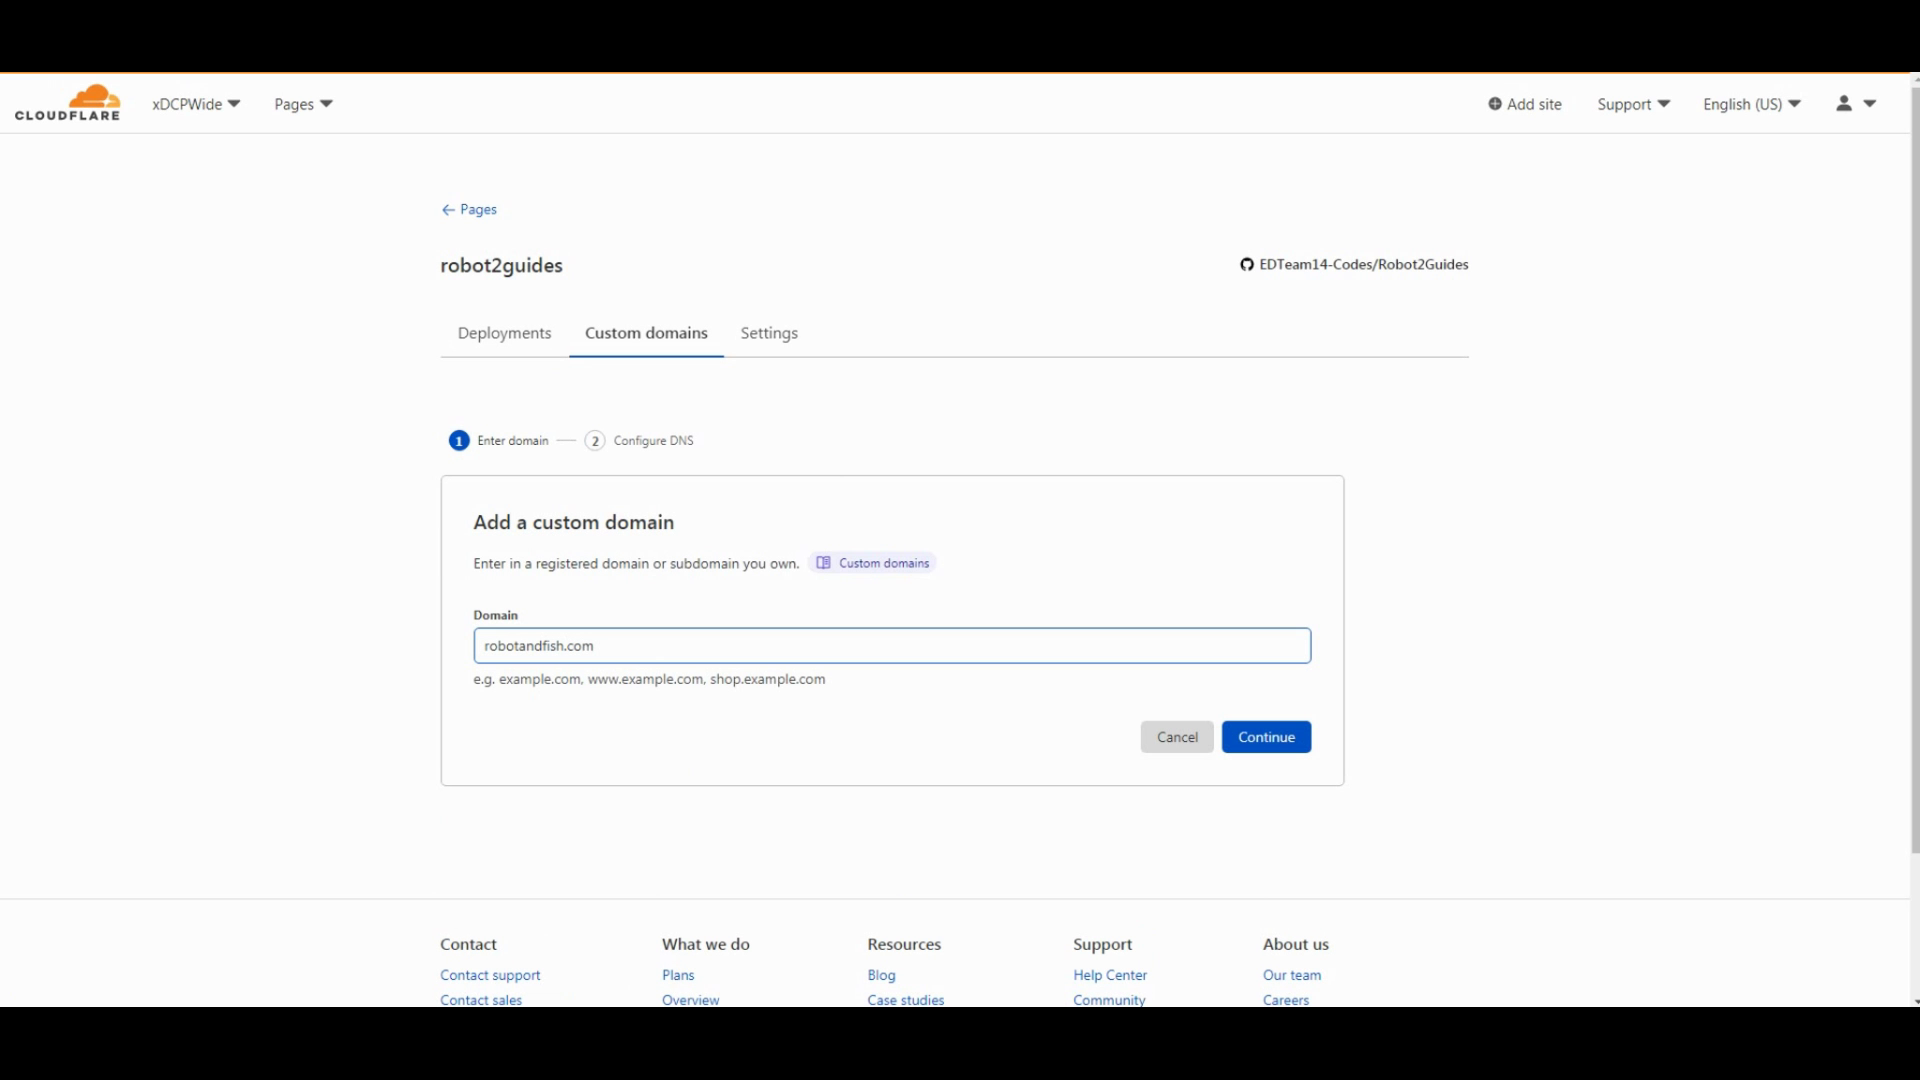
Once it's finished, you can set up a custom domain.
On the Custom Domain tab, enter your domain we added previously. If it asks you to put a record, you can add it. Then it will check to verify your records. Once you added the record, you can ask to get a recheck.
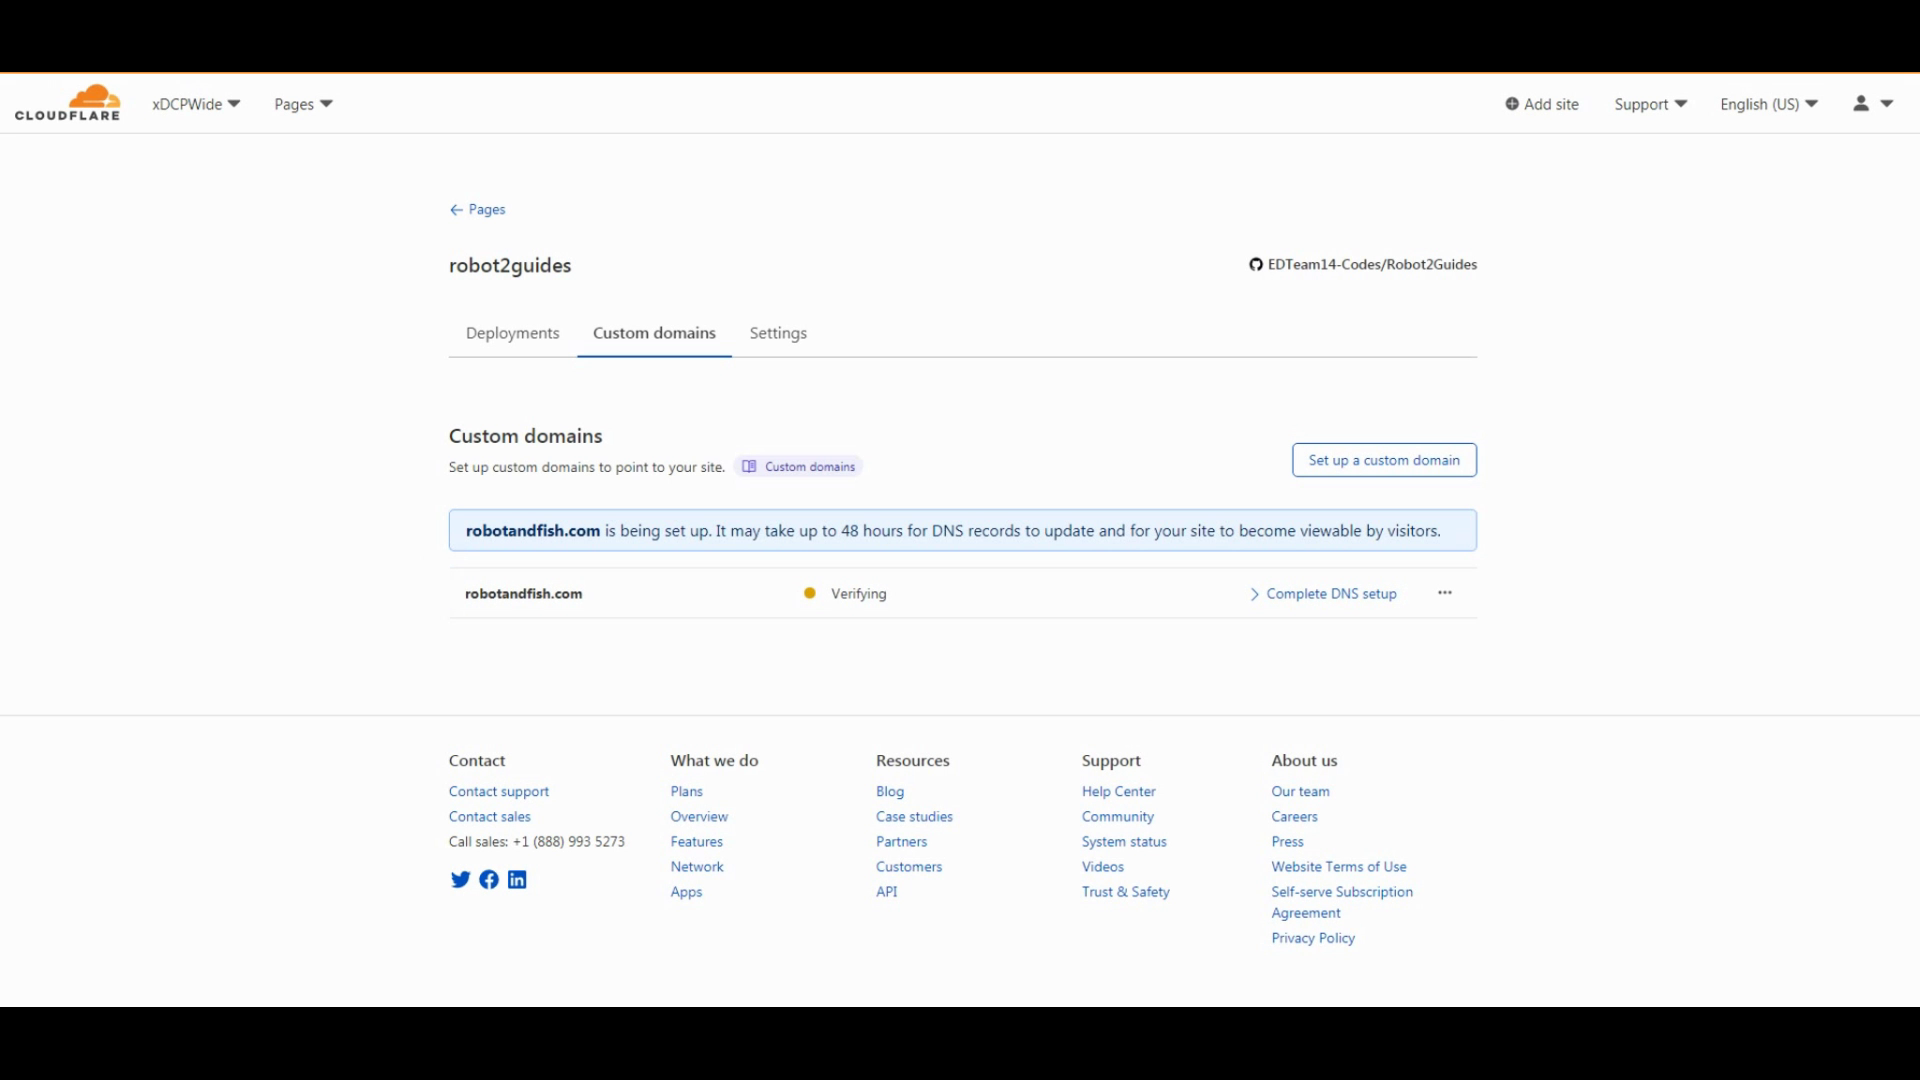
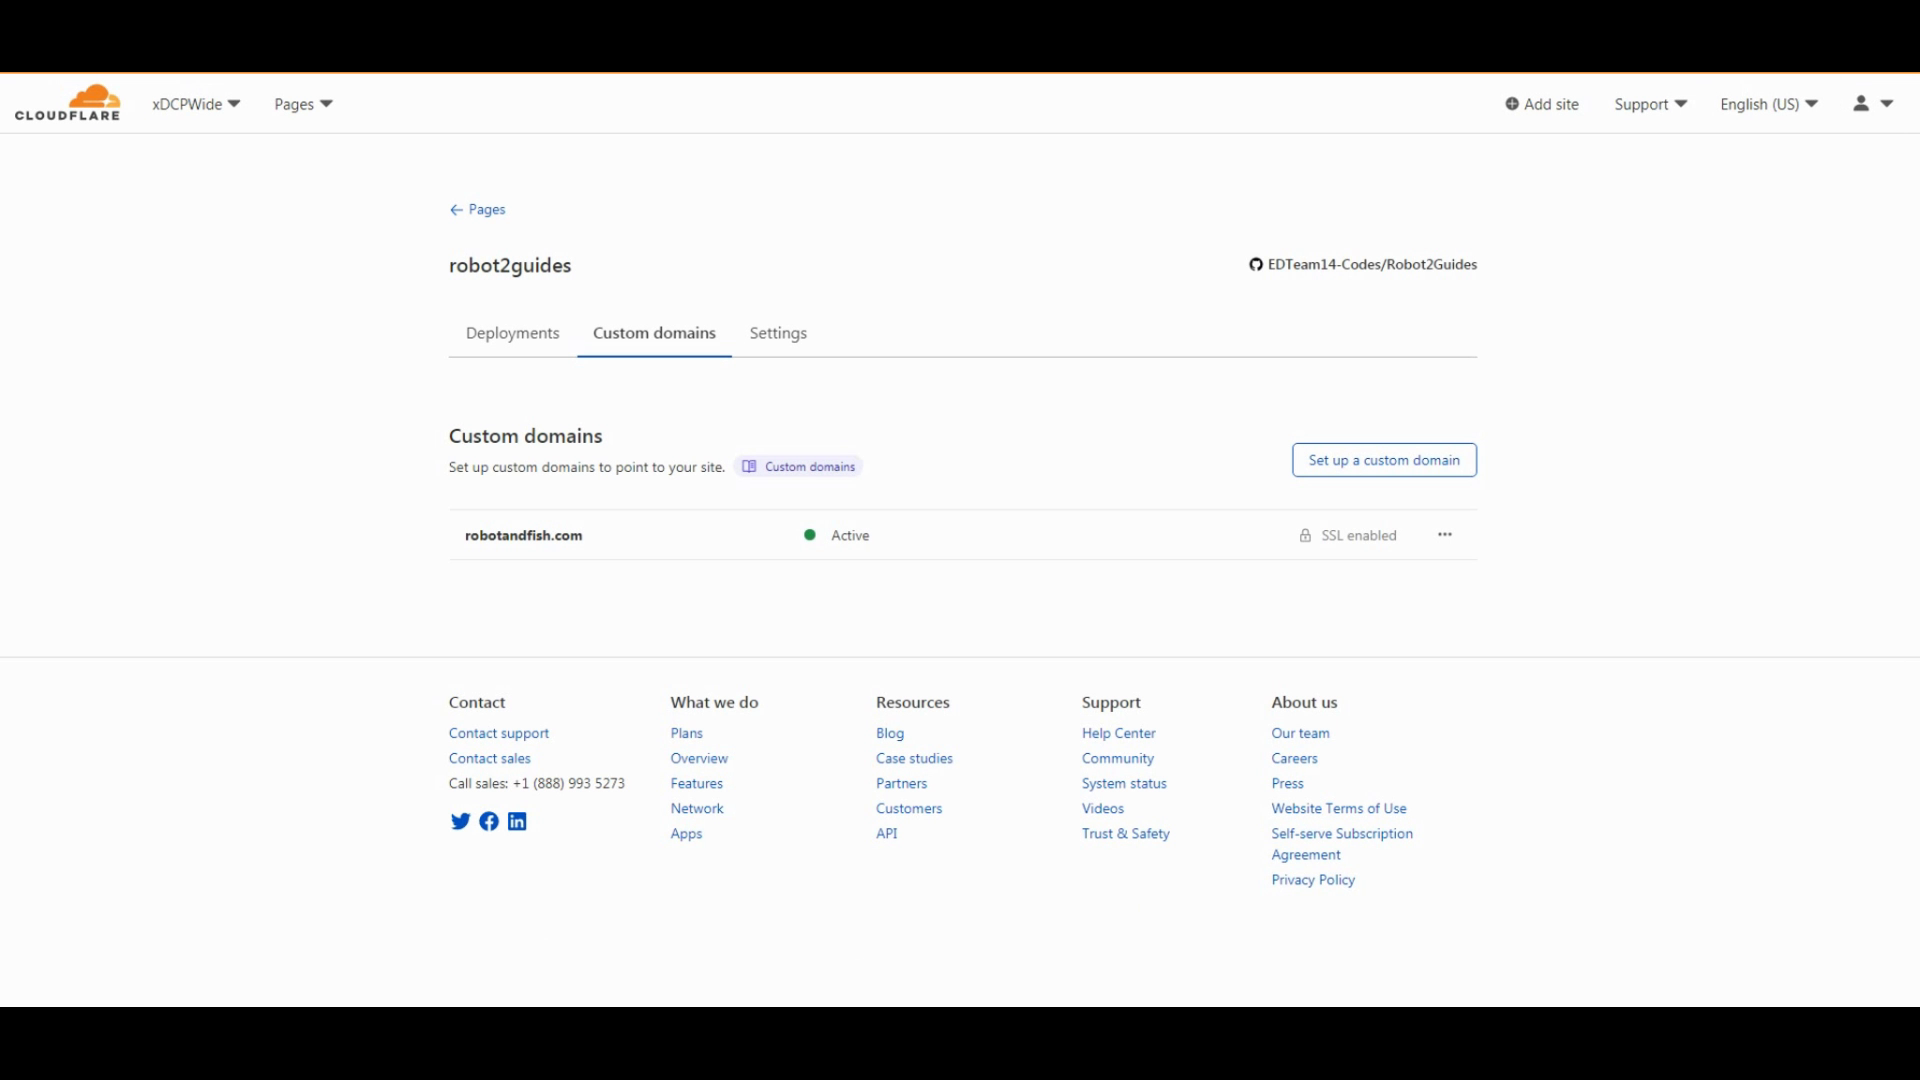
Once it's light turns green, your site is ready with your new domain.
Step 3: Testing
Test your site.
If your site loads. You are finished.
If your site does not load, you might need to wait. Records can take up to 24 hours to propagate.
Troubleshoot if.....
Check your steps or refer to the video. You are free to comment on my YouTube video and I'll try to get back to you.
If your have problems with your domain, contact your registrar for help.